
Are you ready to enjoy fresh bay leaves right from your garden? Propagating bay plants can be a rewarding experience. Knowing the right methods and timing to propagate bay plants can make all the difference in your success. With various techniques available, you can choose the one that fits your gardening style. So, let’s dive into the world of propagating bay plants!
Key Takeaways
Choose the right method for propagation. Use stem cuttings for quicker results or layering for less stress on the parent plant.
Timing is crucial. Take cuttings in mid to late summer for the best chance of rooting and growth.
Prepare your cuttings properly. Use clean tools, apply rooting hormone, and maintain humidity for successful propagation.
Monitor your plants closely. Adjust watering and light conditions to prevent issues like yellowing leaves or wilting.
Be patient and attentive. Successful propagation takes time, but with care, you will enjoy thriving bay plants.
Methods to Propagate Bay
When it comes to propagating bay plants, you have a couple of effective methods at your disposal: stem cuttings and the layering technique. Each method has its own advantages, so let’s explore them in detail.
Stem Cuttings
Stem cuttings are one of the most popular ways to propagate bay plants. This method is straightforward and can yield great results if you follow the right steps. Here’s how to do it:
Timing: Take your stem cuttings in mid to late summer from semi-hardwood branches. This timing helps ensure that the cuttings have the best chance of rooting.
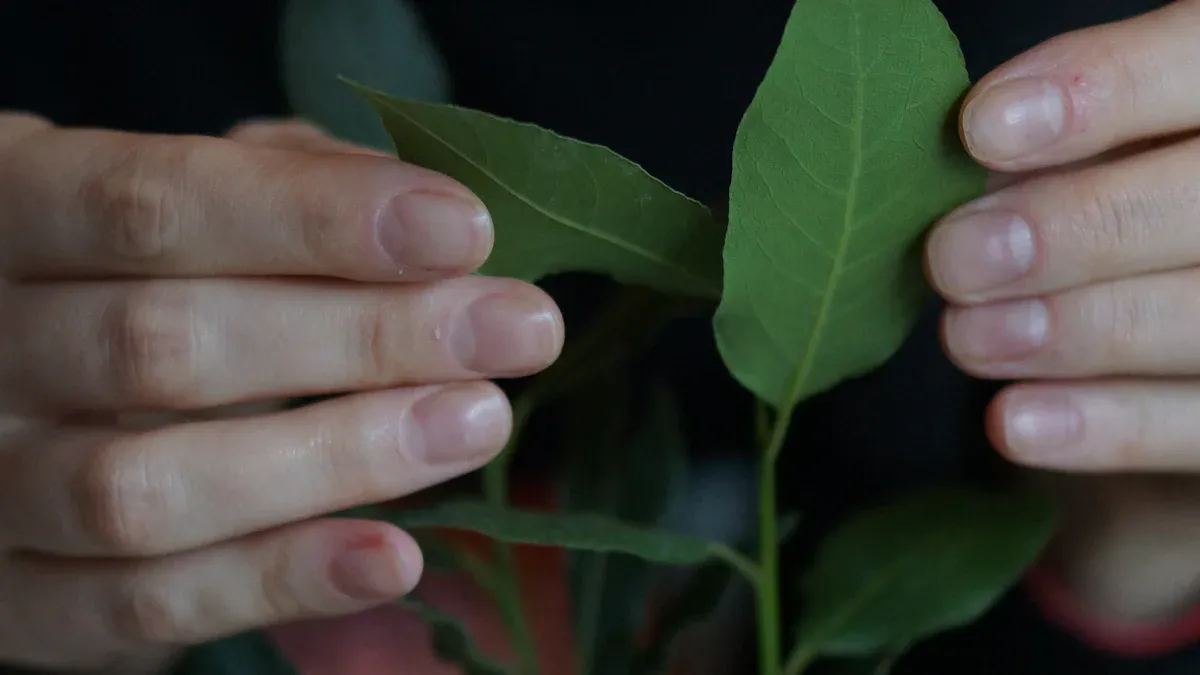
Preparation: Choose a healthy bay plant. Cut a six-inch stem from the plant, and consider using heel cuttings for better success. Heel cuttings involve taking a small piece of the parent stem along with the cutting.
Planting: Dip the cut ends in rooting hormone to encourage root growth. Then, place the cuttings in a potting mix. Cover the pot to retain moisture, creating a mini greenhouse effect.
Transplanting: Once your cuttings have rooted, gradually acclimate them to outdoor conditions before planting them in the ground.
To ensure successful rooting, pay attention to the environmental conditions. Here’s a quick reference table for optimal conditions:
Condition | Recommendation |
|---|---|
Growing Medium | Use coarse sand or a 50:50 mix of potting compost and sharp sand. Fresh, sterile soil is essential. |
Humidity | Maintain high humidity by covering cuttings with clear plastic. |
Light | Provide 6-8 hours of indirect sunlight daily, preferably on a north-facing windowsill. |
Temperature | Aim for around 60°F for optimal rooting conditions. |
Watering Frequency | Water every 1.5-2 weeks, or when the top of the soil feels dry. |
Layering Technique
The layering technique is another effective way to propagate bay plants. This method encourages shoots to form roots while still attached to the parent plant. Here’s how it works:
Method: Bend a flexible branch down to the ground and cover a portion of it with soil, leaving the tip exposed. This allows the buried section to develop roots while still connected to the parent plant.
Advantages: Layering has a high success rate and puts less stress on the parent plant. It’s particularly useful for shrubs and woody herbs that are difficult to propagate from cuttings.
Here’s a table summarizing the benefits and considerations of layering:
Advantages | Disadvantages |
|---|---|
High success rate | Slower process can be cumbersome for indoor settings |
Less stress on the parent plant |
However, be mindful of common mistakes during the layering process. Here are some tips to avoid pitfalls:
Common Mistakes: Not bending the branch properly, failing to nick the bark, or not securing the branch under the soil.
How to Avoid: Ensure the branch is bent at a suitable angle, make a clean nick in the bark, and use soil to firmly hold the branch in place.
Both methods—stem cuttings and layering—offer unique advantages for propagating bay plants. Choose the one that suits your gardening style and enjoy the process of growing your own bay laurel!
Timing for Cuttings
When you decide to propagate bay plants, timing is crucial. The best time to take cuttings is during the mid to late summer months. This period allows you to collect semi-hardwood cuttings, which are more likely to root successfully. Here’s why timing matters:
Seasonal Conditions: During summer, the weather is warm, and the days are longer. These conditions help the cuttings to thrive. The plant is actively growing, which means it can focus its energy on developing roots.
Avoiding Frost: If you take cuttings too early in the spring, you risk exposing them to frost. Frost can damage young plants and hinder their growth. Waiting until summer ensures that the risk of frost has passed.
Here’s a quick reference for the best times to propagate bay plants:
Season | Best Time for Cuttings | Reason |
|---|---|---|
Spring | Not recommended | Risk of frost can harm young cuttings. |
Summer | Mid to late summer | Warm weather promotes root development. |
Fall | Not ideal | Plants start to go dormant, slowing growth. |
Winter | Not recommended | Cold temperatures hinder rooting success. |
By choosing the right time to propagate bay plants, you set yourself up for success. Remember, patience is key. Wait for the right season, and your efforts will pay off with healthy, thriving plants.
Preparing Cuttings for Planting
Before you start propagating your bay plant cuttings, gather the right tools and materials. Having everything ready will make the process smoother and more successful. Here’s what you’ll need:
Clean clippers or a knife (use a 1:10 bleach and water solution to sterilize)
Fresh or sterilized soil
Potting mix with perlite and coco coir (like Tank’s Pro-Lite Seeding and Potting Mix)
Rooting hormone (such as Bontone’s Rooting Powder)
Four-inch containers for planting
Cloche or clear plastic (you can use a plastic bag and sticks)
Once you have your materials, follow these steps to prepare your cuttings effectively:
Take Your Cuttings: Use your clean clippers to snip off a six-inch stem from a healthy bay plant. Make sure to cut just below a leaf node for the best chance of rooting.
Prepare the Cut Ends: Remove the lower leaves from the cutting, leaving a few at the top. This helps the cutting focus its energy on root development instead of supporting leaves.
Apply Rooting Hormone: Dip the cut end of your stem into the rooting hormone. This step is crucial as it encourages root growth, making it easier to propagate bay plants.
Plant the Cuttings: Fill your four-inch container with the potting mix. Make a hole in the center and gently insert the cutting, ensuring that the hormone-coated end is buried in the soil.
Create a Humid Environment: Cover the container with a cloche or clear plastic to maintain humidity. This mini greenhouse effect helps keep the cuttings moist and encourages rooting.
Water and Monitor: Lightly water the soil to settle it around the cutting. Keep an eye on the moisture level, ensuring it stays damp but not soggy.
By following these steps, you’ll set your bay plant cuttings up for success. Remember, patience is key! With the right care, you’ll soon see new growth.
How to Grow Bay Plants
Growing bay plants can be a delightful experience! Once you’ve propagated your cuttings, it’s time to focus on how to grow bay plants successfully. Here are some essential tips for planting and caring for your new bay plants.
Planting Techniques
When you’re ready to plant your rooted cuttings, choose a well-draining potting mix. A mix that includes perlite and coco coir works wonders. Make sure to plant your cuttings in pots that are at least four inches deep. This gives the roots enough space to grow.
After planting, place your pots in a location where they can receive plenty of indirect sunlight. Bay plants thrive in bright light, so a spot near a south-facing window is ideal.
Watering Requirements
Watering is crucial for your bay plants. Newly propagated plants need consistent moisture but avoid overwatering. A good rule of thumb is to give them about 0.5 cups of water every 9 days when they’re not in direct sunlight. This helps keep the soil damp without drowning the roots.
Here’s a quick reference table for watering and light requirements:
Requirement | Details |
|---|---|
Watering | 0.5 cups every 9 days when not in direct sunlight |
Light | Place less than 1 foot from a south-facing window for optimal growth |
Care Tips
As you care for your bay plants, keep an eye on their growth. If you notice the leaves turning yellow, it might be a sign of overwatering. Adjust your watering schedule accordingly. Also, remember to rotate your pots every few weeks. This ensures that all sides of the plant receive equal light, promoting even growth.
By following these tips on how to grow bay plants, you’ll set yourself up for success. Enjoy nurturing your bay plants and watching them flourish!
Troubleshooting Issues
When propagating bay plants, you might run into a few common problems. Don’t worry! With some knowledge and care, you can overcome these challenges. Here are some issues you may face and how to tackle them:
Insect Infestations: Bay plants can attract pests like boring insects and scale insects. If you notice these critters, prune the affected areas immediately. You can also introduce natural predators, such as lacewings, to help control the pest population.
Fungal Diseases: Canker diseases can be a real headache. To prevent these fungal infections, avoid overwatering your plants. If you spot any diseased branches, prune them right away. Using bacterial fungicides can also help. These products can either consume the fungus or trigger your plant’s defenses. They work best as a preventative measure but can limit the spread if applied after disease onset.
Damping Off: This is a common issue with seedlings. It occurs when the soil is too wet and leads to fungal growth. To prevent damping off, use a well-drained medium and ensure proper irrigation practices. Monitor your seedlings closely for any signs of disease.
Here’s a quick checklist to help you prevent and treat these issues:
Clear your greenhouse of plant debris and weeds before planting.
Disinfect your tools and pots to avoid introducing pathogens.
Inspect your stock plants for diseases and avoid taking cuttings from infected ones.
Dip your cutting tools in disinfectant between stock plants.
Monitor seedlings for symptoms of damping off and other diseases.
Apply fungicides at the first sign of disease or preventively for valuable crops.
By staying vigilant and following these tips, you can ensure your bay plants thrive. Remember, a little care goes a long way in keeping your garden healthy! 🌱
In summary, propagating bay plants can be a fulfilling journey. Remember these key points:
Patience is essential. Successful propagation takes time, so don’t rush the process.
Care matters. Consistent attention to your plants leads to better growth and healthier leaves.
Consider these takeaways from recent studies:
Key Takeaway | Description |
|---|---|
Genetic Diversity | Allowing plants to reproduce by seed maximizes genetic diversity. |
Timing for Division | Avoid dividing plants while blooming; cooler temperatures reduce stress. |
Potting Divides | Set up a potting station with necessary tools for immediate relocation. |
Experiment with different propagation methods, like stem cuttings or layering. Nurture your new bay plants, and enjoy the rewards of your gardening efforts! 🌱
FAQ
What is the best way to propagate bay plants?
You can propagate bay plants using stem cuttings or the layering technique. Both methods are effective, but stem cuttings are quicker, while layering is less stressful for the parent plant.
How long does it take for bay cuttings to root?
Bay cuttings typically take about 4 to 8 weeks to root, depending on environmental conditions. Keep the soil moist and provide indirect sunlight to encourage faster growth.
Can I propagate bay plants in water?
While you can try propagating bay cuttings in water, it’s generally more successful in soil. Water may not provide the necessary nutrients for healthy root development.
What should I do if my bay cuttings are wilting?
If your cuttings are wilting, check the moisture level in the soil. They may need more water or less direct sunlight. Adjusting these factors can help revive them.
When can I transplant my rooted bay cuttings?
You can transplant your rooted bay cuttings once they have developed a strong root system, usually after 4 to 8 weeks. Gradually acclimate them to outdoor conditions before planting them in the garden.
