Semi-hydroponics can feel confusing at initially, yet it often becomes surprisingly calming once someone understands the steps. This guide walks through 10 simple actions that help a plant move from soil into LECA or another chunky medium, while keeping roots safe and growth steady. It moves from choosing the right plant and tools, into preparing containers, rinsing media, cleaning roots, and finally adjusting light and nutrients so each plant has the best chance to thrive.
Choose the Right Plants for Semi-Hydro
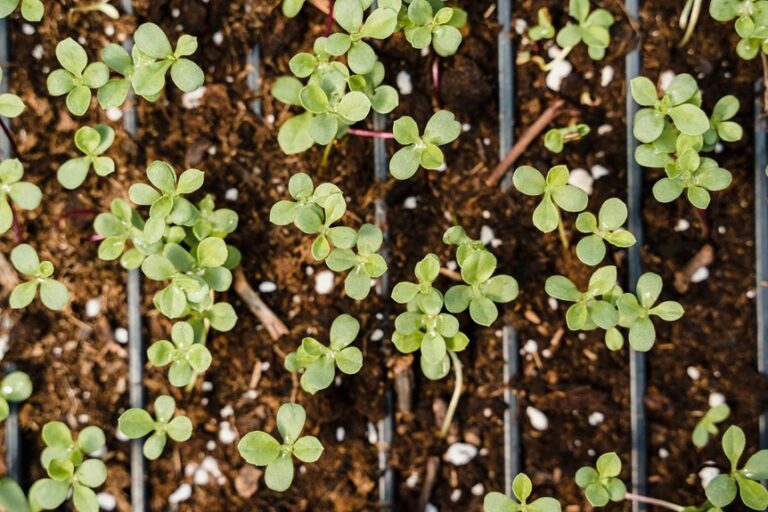
Why does choosing the right plant feel like such a big decision? Because once someone moves to semi hydro, the plant becomes a long term partner, not a quick project. So it helps whenever the plant already enjoys steady moisture and strong roots. Many growers start with aroid houseplants, orchids, or African violets, since these usually adjust faster.
A plant with firm stems, active growth, and white, branching roots usually shifts more smoothly. In case roots are weak, air layering on the mother plant can build a stronger system initially. Root stitching, where rooted cuttings are gently arranged so roots spread evenly, also supports stable growth. Upon noticing how a plant drinks, grows, and recovers, a person slowly learns which ones truly thrive in semi hydro.
Gather Your Semi-Hydro Materials and Tools
Before anyone starts moving plants into semi-hydro, they initially need the right gear ready to go. In this part, the focus shifts to choosing containers that fit the plant, picking good LECA and other media, and gathering simple tools that make the work cleaner and easier.
With these pieces in place, the whole conversion process feels calmer, more organized, and a lot less scary.
Choosing Suitable Containers
Gently choosing the right container can make the whole semi-hydroponic experience feel calmer and more predictable. Whenever someone picks opaque pots, roots stay shielded from light, so algae stays low and growth stays steady. This simple choice already reduces stress for both grower and plant.
Next, container shape and depth guide how water moves. A tall, narrow pot holds a deeper reservoir, while a wide one dries a bit faster. With this in mind, self watering designs offer a steady moisture level, which supports busy schedules and forgetful days. Decorative coverpots then hide plain inner containers and fit home style. Finally, breathable liners help air reach roots while keeping media contained, so cleaning, repotting, and long term care feel easier.
Selecting LECA and Media
Choosing LECA and other media becomes much easier once a person understands what the plant actually needs from its new home. With that clear, Leca sourcing feels less scary and more like a careful search for clean, strong clay balls that hold water without breaking down. A grower looks for consistent size, low dust, and a neutral pH, because these details protect roots.
Then attention shifts to media compatibility. Some plants enjoy pure LECA, while others feel safer with a mix of LECA and chunky bark or pumice. This balance controls moisture, air, and support. As roots adapt to semi hydro, the media should keep oxygen flowing, stop soggy spots, and allow easy flushing so salts do not quietly build up.
Essential Tools and Supplies
A small set of simple tools can turn a confusing semi hydro project into a calm, step‑by‑step process. Whenever a grower gathers everything initially, the work feels slower, steadier, and far less stressful.
They usually start with clear nursery pots and solid cachepots so they can see water levels but still protect roots from light. Then they add measuring cups, a small spoon, and a soft brush for cleaning LECA and roots. For pH testing, they keep either strips or a digital meter nearby, using it each time they mix fresh solution. A nutrient calculator helps them measure fertilizer with accuracy instead of guessing.
Finally, labels, a fine-tipped marker, and paper towels keep their setup organized, tidy, and repeatable.
Select the Best Containers and Reservoir Setup
Container choice quietly shapes how well a semi hydroponic setup works, so it matters more than it could appear at initially glance. Upon someone picks a container, they guide how roots breathe, drink, and stay stable. Clear plastic helps them watch roots and water level, while opaque pots protect roots from light and algae. Side holes set just above the base create a steady reservoir.
Next, container placement supports plant health and daily care. Stable, level surfaces prevent spills and cracked pots. Easy access makes reservoir maintenance calmer, since topping off and checking waterlines feels simple, not stressful. Matching pot size to root mass keeps plants anchored, limits tip overs, and lets the reservoir hold enough solution for steady growth.
Prepare and Rinse Your Inorganic Growing Medium
Before any plant moves into semi-hydroponics, the growing medium needs careful attention so roots feel safe and supported.
In this step, the reader will choose the right inorganic medium, rinse away dust and residue, and then pre-soak it so each piece holds steady moisture.
Through treating this part with patience, the plant gains a clean, hydrated home that makes the later shift much less stressful.
Choosing the Right Medium
In this step of the excursion into semi-hydroponics, the choice of growing medium quietly sets the stage for everything that follows. The medium will guide moisture, oxygen, nutrients, pH buffering, and even future microbial communities, so it deserves patient attention.
A grower looks initially at how a medium holds water yet still lets roots breathe. Clay pebbles, pumice, and lava rock each manage moisture differently, shaping root growth and nutrient flow. Next comes stability. A good medium keeps its shape, drains predictably, and does not decompose or compact.
To envision this, someone could visualize:
- Smooth clay pebbles clicking into place
- Dark lava rock with tiny glassy pores
- Pale pumice floating lightly in water
- Mixed grades balancing air and moisture
- Roots threading confidently through open spaces
Proper Rinsing Techniques
Often overlooked yet absolutely essential, rinsing the inorganic growing medium becomes the quiet cleaning step that protects roots from future stress. In this stage, the grower treats rinsing as part of serious deep cleaning rituals, not as a quick splash in the sink.
Initially, they check water quality testing results, because poor water can add new contaminants while trying to remove old ones.
They pour water slowly through the medium, using gentle agitation with their fingers to release dust, residue, and concealed grit. The water runs until it shifts from cloudy to clear, which signals less risk of mineral buildup and trapped fines.
With each rinse, the medium becomes a safer, calmer place where roots can breathe, anchor, and adapt with confidence.
Pre-Soaking for Hydration
Once the rinsed medium sits clean and fresh, the next gentle step becomes pre-soaking, which quietly prepares every particle to support new roots.
In this pause prior to planting, the medium soaks in clean water or a mild nutrient solution. As pores fill, trapped air escapes, so roots will not face dry pockets or surprise air gaps.
Pre-soaking also helps protect leaf turgor. Upon roots entering a fully hydrated medium, water moves steadily into the plant, and osmotic balance stays stable instead of swinging wildly.
This calm start lowers stress and wilt.
- Tiny bubbles rising as air leaves the pellets
- Surfaces turning darker as water sinks in
- A container humming with quiet stillness
- Roots later sliding between smooth, wet stones
- Leaves standing firm, bright, and confident
Safely Remove Your Plant From Its Soil
Gently easing a plant out of its soil can feel a little scary, especially as roots are concealed and everything looks fragile. Yet with slow, steady movements, the process turns calm instead of stressful. The pot is tipped, the stem is supported, and the root ball slides out in one quiet motion. This is the moment for careful root inspection and gentle soil disposal, not rushing.
| Step Focus | Purpose |
|---|---|
| Loosen pot edges | Reduce pull on roots |
| Support main stem | Prevent bending or snapping |
| Slide root ball out | Lower shock to the plant |
| Crumble soil softly | Expose structure without tearing |
| Set plant aside | Let roots rest before the next stage |
Each patient movement protects both plant health and confidence.
Clean and Trim the Roots for Hydro Transition
At this stage, the plant’s roots need gentle care so they can adjust to water-based life without shock.
The grower now carefully rinses away old soil, working slowly so the root system stays as intact and calm as possible.
As the roots become clean, it also becomes easier to spot and trim damaged or rotting sections, which helps the plant stay healthy in its new semi-hydroponic home.
Gently Rinse Old Soil
Careful rinsing of the old soil becomes the gentle bridge between life in a pot and life in semi hydroponics. In this step, the grower works slowly, so roots stay calm and protected.
Lukewarm water flows over the root ball, carrying away clinging particles while keeping helpful surface microbes mostly intact. A steady rinse frequency prevents shock, letting the plant adjust instead of panic.
As the soil loosens, fingers lightly tease it away, never pulling or twisting roots. Clear water in the sink or basin shows how much debris still remains, guiding each pass.
- Roots floating in clear water
- Soil clouds drifting away
- Fingers supporting fragile strands
- Tiny surface microbes clinging quietly
- A patient grower breathing easier
Prune Damaged Root Sections
Pruning damaged roots becomes the turning point where the plant lets go of stress and starts fresh in its new semi hydroponic home.
At this stage, the grower gently spreads the roots and looks closely for trouble. Healthy roots feel firm and look white or light tan. Dark, mushy, or foul-smelling roots signal premature root rot and must be removed.
With clean, sharp scissors, the grower trims away every weak section. Each careful cut helps stop disease from spreading deeper into the plant.
After trimming, they allow the roots to dry slightly so natural wound sealing can begin. This short pause reduces shock.
In this calm reset, the plant can focus on growing fresh, water-ready roots for its new setup.
Pot Your Plant Into the Semi-Hydro Container
With the new container ready and the plant cleaned up, this is the moment at which everything comes together in its semi-hydro home.
The grower chooses a pot size that lets roots spread without drowning them in excess space. They gently hold the plant at its old soil line, then pour rinsed medium around the roots, letting pieces slide into every gap.
They tap the pot so roots settle instead of bending. The reservoir line is checked, since that level will guide the future watering schedule and keep roots in the moist, oxygen rich zone. Finally, the plant is centered for balance and light.
- Roots cradled in smooth clay pebbles
- Clear reservoir line visible
- Upright, stable stem
- Even medium surface
- Clean rim around the pot
Mix and Add the Nutrient Solution Correctly
How does a simple mix of water and nutrients become the plant’s main food supply in semi hydro? It starts with careful nutrient calibration. The grower chooses a complete fertilizer, then mixes it into room temperature water, checking strength with a TDS or EC meter. This keeps roots safe from burn while still feeding growth.
Then, solution aeration comes in. By stirring well, leaving some air space in the reservoir, and renewing the mix often, the roots get steady oxygen along with minerals. The planter fills the reservoir only to the set line, so the lower roots sip, while upper roots breathe. Over time, the grower watches leaf color, growth speed, and salt build up, then adjusts the mix with quiet confidence.
Adjust Light, Temperature, and Humidity for Recovery
In the days right after a semi hydroponic conversion, the plant feels a bit like someone waking up in a strange room, so light, temperature, and humidity become its comfort blanket. Light acclimation now matters more than ever.
Instead of blasting strong rays, the grower gives bright but indirect light, so new roots can form without extra stress.
Humidity buffering also plays a key role. Warm, stable air helps the plant breathe while roots adjust to the new medium.
Slightly higher humidity, paired with gentle airflow, keeps leaves from wilting and reduces water loss.
- Soft morning light sliding through sheer curtains
- A tray of damp clay pebbles quietly raising humidity
- A small fan moving air in lazy circles
- Thermometer holding steady in the comfort zone
- Leaves slowly lifting as stress fades
Monitor Growth and Fine-Tune Your Semi-Hydro Routine
Slowly but surely, the real work of semi hydroponics begins as the plant starts to show tiny signs of new life. Here, careful growth tracking becomes the grower’s best friend. Through watching leaf color, root tips, and new nodes, a person can see how well the plant accepts its new routine and whether small changes are needed. Here’s your routine:
| Checkpoint | What to Observe | Possible Adjustment |
|---|---|---|
| New leaves | Color, size | Adjust nutrients |
| Roots | Color, branching | Refresh solution |
| Stems | Firmness, thickness | Improve light, feeding |
| Media surface | Algae, salt crust | Rinse, reduce strength |
| Overall habit | Leaning, drooping | Change water level |
Growth tracking naturally leads into nutrient tuning, because each sign the plant gives is feedback. Pale leaves can signal weak feed. Burned tips can hint that the mix is too strong. Water level, nutrient strength, and flush timing all work together.