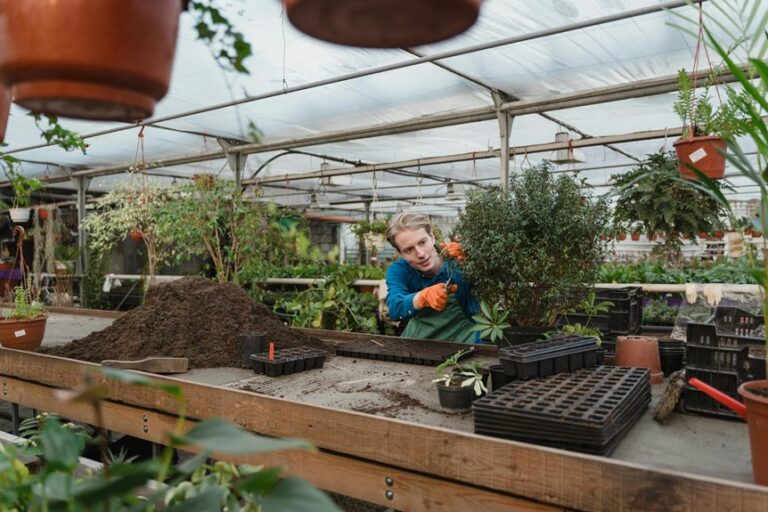
Flowers hold a unique beauty that captivates the heart. Their vibrant colors and delicate forms inspire you to preserve them forever. Natural preservation methods allow you to keep these treasures while being kind to the environment. By choosing sustainable techniques, you not only maintain the flowers’ beauty but also support soil health and biodiversity. For instance, organic practices can enhance pollinator populations, which are vital for our ecosystems. Embrace the joy of preserving flowers naturally and keep your cherished memories alive.
Key Takeaways
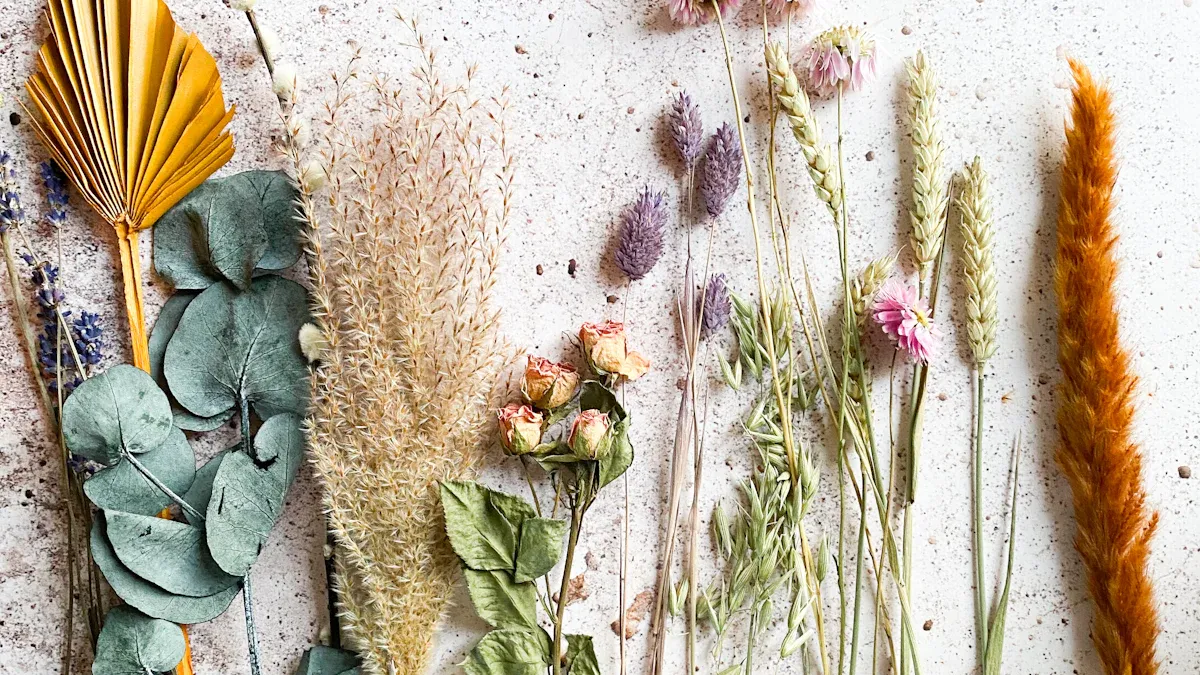
Air drying flowers is simple and effective. Choose sturdy blooms, trim stems, and hang them upside down in a dry area to maintain their shape.
Pressing flowers creates beautiful keepsakes. Use absorbent paper and heavy books to apply pressure, allowing flowers to dry for one to two weeks.
Silica gel preserves delicate flowers’ colors and shapes quickly. Arrange flowers in silica gel and seal them for 2-7 days for vibrant results.
Sand drying enhances flower colors and maintains their shape. Use fine sand in a sturdy box, ensuring flowers are spaced apart for best results.
Resin preservation offers a modern aesthetic. Mix resin and hardener, pour over flowers in a mold, and allow to cure for 24-72 hours for lasting beauty.
Air Drying Flowers
Air drying flowers is one of the simplest and most effective methods for preserving their beauty. This technique allows you to dry full bouquets while maintaining their shape and color. To air dry flowers, follow these steps:
Steps for Air Drying
Choose Your Flowers: Select flowers that are suitable for air drying. Some excellent options include:
Ageratum (floss flower)
Amaranth (globe)
Baby’s breath
Lavender
Roses and rose buds
Prepare the Stems: Trim the stems to your desired length. Remove any leaves that may touch the ground during drying.
Bundle the Flowers: Gather the flowers into small bunches. Tie the stems together with string or rubber bands.
Hang Upside Down: Hang the bunches upside down in a dry, well-ventilated area. This position helps the flowers maintain their shape while gravity assists in the drying process.
Wait for Drying: Allow the flowers to dry for about 116 minutes under optimal conditions. Check them periodically to ensure they are drying evenly.
Materials Needed
Fresh flowers
String or rubber bands
Scissors
A dry, well-ventilated space (like a closet or attic)
Tips for Success
Avoid Direct Sunlight: Keep the flowers out of direct sunlight to prevent fading.
Use a Fan: If possible, use a fan to improve air circulation in the drying area.
Check for Moisture: Ensure the flowers are completely dry before removing them from their hanging position. This prevents mold growth.
Air drying is a fantastic way to preserve flowers naturally. You can enjoy their beauty long after the blooms have faded.
Pressing Flowers
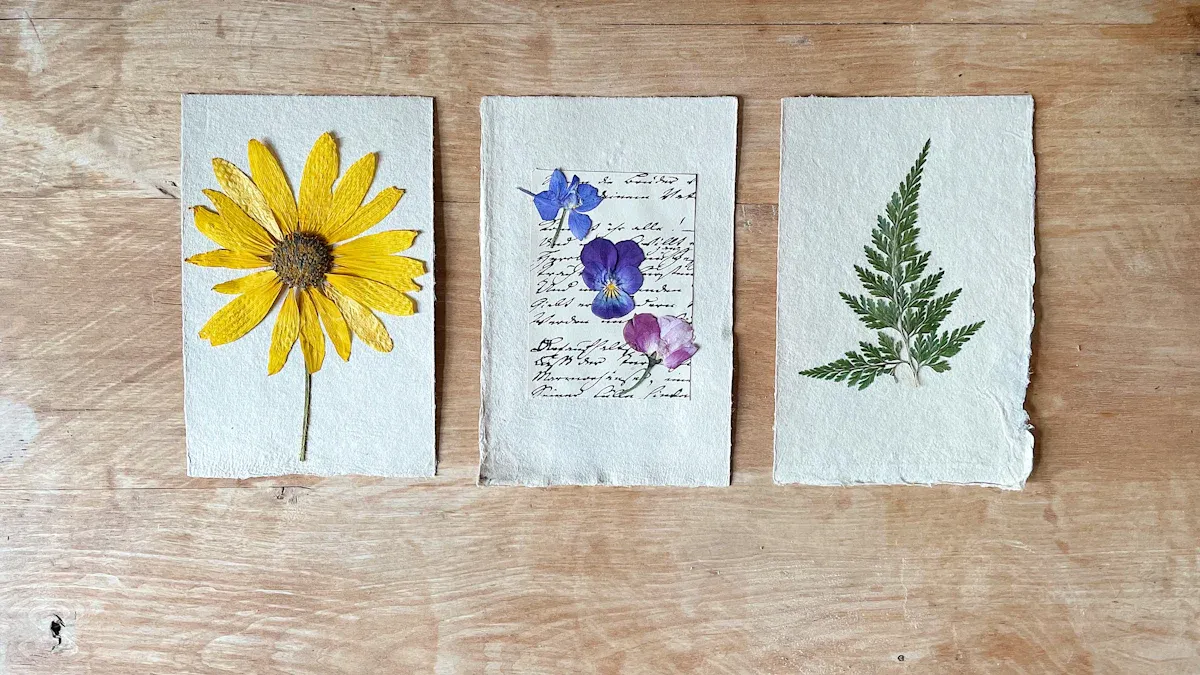
Pressing flowers is a wonderful way to preserve their color and shape. This method allows you to create beautiful keepsakes that capture the essence of your favorite blooms. You can use pressed flowers in various crafts, such as cards, bookmarks, or framed art. Follow these steps to press flowers effectively:
Steps for Pressing
Select Fresh Flowers: Choose flowers that are flat and have vibrant colors. Good options include:
Pansies
Daisies
Violets
Ferns
Prepare the Flowers: Remove any excess leaves and trim the stems. Make sure the flowers are clean and dry.
Arrange the Flowers: Place the flowers between two sheets of absorbent paper. You can use newspaper, blotting paper, or parchment paper.
Press the Flowers: Stack heavy books on top of the paper to apply pressure. Leave the flowers to press for about one to two weeks.
Check for Dryness: After the pressing period, carefully remove the flowers. If they feel dry and crisp, they are ready to use.
Materials Needed
Fresh flowers
Absorbent paper (newspaper, blotting paper, or parchment paper)
Heavy books or a flower press
Scissors
Tips for Success
Use Newspaper: Newspaper is the most affordable option for pressing flowers. It absorbs moisture effectively. Use 3–12 sheets of folded newspaper for optimal results. If you use fewer sheets, replace the newspaper daily to ensure proper drying.
Avoid Overlapping: When arranging flowers, avoid overlapping them. This prevents them from sticking together and ensures even pressing.
Store Properly: Once pressed, store your flowers in a cool, dry place to maintain their color and shape.
The practice of flower pressing dates back to ancient civilizations. Archaeological discoveries show that people have used flowers for decorative purposes for thousands of years. During the mid-1800s, flower pressing became popular among Victorian women, who sought new artistic expressions. This historical context adds depth to your flower pressing experience.
By following these steps, you can create stunning pressed flowers that serve as lasting memories.
Using Silica Gel
Using silica gel is a top method for preserving flowers. This technique excels at maintaining the color and texture of delicate blooms. Silica gel absorbs moisture quickly, preventing wilting and fading. You can enjoy vibrant, three-dimensional flowers in just a few days. Follow these steps to use silica gel effectively:
Steps for Using Silica Gel
Gather Your Materials: Collect fresh flowers and silica gel. Choose flowers that are not too thick, such as:
Daisies
Roses
Zinnias
Prepare the Flowers: Trim the stems to your desired length. Remove any leaves that may touch the silica gel.
Fill a Container: Pour a layer of silica gel into a container. Ensure it covers the bottom evenly.
Place the Flowers: Arrange the flowers upright in the silica gel. Make sure they do not touch each other.
Cover with Silica Gel: Gently pour more silica gel over the flowers. Ensure they are completely covered.
Seal and Wait: Seal the container and let it sit for 2-7 days. Check periodically to see if the flowers are dry.
Materials Needed
Fresh flowers
Silica gel
A container with a lid
Scissors
Tips for Success
Choose the Right Flowers: Select flowers with sturdy petals. They hold up better during the drying process.
Avoid Overcrowding: Give each flower enough space. This prevents them from sticking together.
Store Properly: Once dried, store your flowers in a cool, dry place. This helps maintain their beauty.
Using silica gel offers several advantages over other methods. It preserves the natural shape and texture of flowers, unlike air drying, which can cause brittleness. The table below highlights some key benefits of using silica gel:
Evidence Type | Description |
|---|---|
Easy Preservation | Silica gel’s rapid moisture absorption ensures flowers retain their natural form and color, thwarting wilting and fading. |
Shape & Color Retention | Unlike other methods that may flatten or dull flowers, silica gel maintains their three-dimensionality and original hues. |
Speedy Results | Compared to air-drying, which can take weeks, silica gel delivers dried flowers within days, accelerating your enjoyment. |
Silica gel is widely available and affordable. Here’s a quick overview of some options:
Product | Price | Availability |
|---|---|---|
Silica Gel for Drying Flowers | $22.00 | Available |
Flower Drying Art® Silica Gel 10 lb | $43.56 | In Stock, Ready to Ship |
By using silica gel, you can create stunning preserved flowers that last for years. This method not only enhances your floral displays but also allows you to keep memories alive through beautiful creations.
Drying Flowers in Sand
Drying flowers in sand is an effective method for preserving their beauty. This technique helps maintain the flower’s shape and enhances its color. You can achieve vibrant hues when drying quickly in a warm environment. Slower drying in cooler conditions results in softer, muted tones. Here’s how to do it:
Steps for Sand Drying
Prepare the Box: Pour a half-inch layer of sand into a sturdy box. This layer serves as the base for your flowers.
Place the Flowers: Gently position the flowers or foliage stems on the sand. Ensure they are spaced apart to avoid sticking together.
Cover with Sand: Use a soup can to pour sand over the flowers. Let the sand flow around, under, and over each part of the flower until it is completely covered.
Support the Flowers: As you pour, use a slim tool like a paintbrush to support the flower. This prevents damage during the process.
Wait for Drying: After two weeks, tip the box to allow the sand to pour out slowly from one corner. Lift the flower in the same direction as the sand flows to avoid breaking it.
Clean the Flowers: Finally, clean the dried flower with a gentle stream of sand to remove any residue.
Materials Needed
Fine sand
A sturdy box or container
Fresh flowers
A slim tool (like a paintbrush)
A soup can for pouring sand
Tips for Success
Choose the Right Sand: Use fine sand for better results. It minimizes residue on the flowers, making it cleaner than silica gel.
Drying Environment: A warm, dry room promotes bright colors. If you prefer softer tones, consider a cooler space for slower drying.
Flower Selection: Some flowers, like tulips and zinnias, respond well to sand drying. Check the table below for more flower species that thrive with this method.
Flower Species | Drying Method |
|---|---|
Tulips | Sand drying |
Snapdragons | Sand drying (horizontal) |
Marigolds | Sand drying |
Roses | Upside-down in sand |
Dahlias | Sand drying |
Daisies | Petals facing down |
Zinnias | Sand drying |
Pansies | Sand drying |
Pompon Chrysanthemums | Sand drying |
Lilacs | Sand drying (horizontal) |
Using sand for drying flowers not only preserves their form and color but also results in a lifelike appearance. This method offers a cleaner option compared to silica gel, allowing you to enjoy your preserved flowers for years to come.
Preserving Flowers in Resin
Preserving flowers in resin creates stunning, long-lasting keepsakes. This method captures the beauty of flowers while providing durability. You can display your preserved flowers in various ways, such as in jewelry, coasters, or decorative pieces. Follow these steps to preserve flowers in resin effectively:
Steps for Resin Preservation
Select Your Flowers: Choose fresh flowers that are not too thick. Good options include:
Roses
Daisies
Lilies
Prepare the Flowers: Trim the stems and remove any leaves. Ensure the flowers are clean and dry.
Mix the Resin: Follow the instructions on your resin kit. Typically, you will mix equal parts of resin and hardener in a clean container.
Pour the Resin: Pour a thin layer of resin into your mold. This layer acts as a base for your flowers.
Arrange the Flowers: Place the flowers in the resin. You can position them however you like.
Add More Resin: Pour additional resin over the flowers until they are fully submerged.
Cure the Resin: Allow the resin to cure according to the manufacturer’s instructions. This usually takes 24 to 72 hours.
Materials Needed
Fresh flowers
Epoxy resin kit
Mixing container
Mold (silicone molds work well)
Gloves and goggles (for safety)
Tips for Success
Safety First: Always wear latex gloves, goggles, and a respirator when working with resin. This protects your skin, eyes, and lungs from harmful chemicals.
Avoid Air Bubbles: To minimize air bubbles, pour the resin slowly and gently. You can also use a toothpick to pop any bubbles that form.
Store Properly: Keep your finished pieces out of direct sunlight. This helps maintain their color and prevents fading.
Preserving flowers in resin offers a glossy finish and a modern aesthetic. According to user reviews, resin flowers last longer than dried flowers. They remain sealed from damage, making them dust-resistant and easy to maintain. Here’s a quick comparison:
Aspect | Resin Flowers | Dried Flowers |
|---|---|---|
Aesthetic | Glossy finish, modern aesthetic | Natural, rustic charm |
Durability | Last longer, sealed from damage | Can become brittle, lose vibrancy |
Maintenance | Minimal, dust-resistant | Requires gentle dusting, sunlight care |
Preservation | Retains color and shape indefinitely | Loses vibrancy over time |
Flowers preserved in resin can last for decades, typically 20 years or more, if you care for them properly. Avoid exposing them to sunlight and environmental factors to maintain their beauty.
Best Flowers for Preservation
When you think about preserving flowers, certain types stand out for their durability and beauty. Here are some of the best flowers you can choose for preservation:
Types of Flowers
Hydrangea: Known for their stunning hues, hydrangeas maintain their color well when dried. They add a beautiful touch to any arrangement.
Strawflower: This flower features a dry, papery texture, making it ideal for preservation. Its vibrant colors remain intact over time.
Cockscomb: With its bright colors, cockscomb retains its appearance well during the drying process. It adds a unique flair to preserved arrangements.
Lavender: Hardy and fragrant, lavender is commonly used in dried arrangements. Its scent and color make it a favorite among flower enthusiasts.
Seasonal Considerations
The season in which you harvest flowers greatly affects their preservation success. Different flowers thrive in different seasons. Here’s a quick overview:
Season | Flower Types | Preservation Characteristics |
|---|---|---|
Spring | Tulips, Daffodils, Cherry Blossoms, Peonies | Delicate blooms, ideal for soft pastel arrangements. |
Summer | Sunflowers, Zinnias, Roses, Hydrangeas | Bold colors, perfect for vibrant and striking displays. |
Autumn | Dahlias, Chrysanthemums, Marigolds | Warm tones, suitable for earthy and sophisticated designs. |
Winter | White Roses, Evergreens, Silver Foliage | Limited selection, but can create enchanting winter themes. |
Humidity plays a crucial role in the preservation process. High humidity can lead to mold growth and discoloration. Low humidity can cause flowers to become brittle. Aim to keep humidity levels below 70% for the best results. In humid climates, consider using dehumidifiers to protect your flowers. In dry climates, humidifiers can help prevent brittleness.
By selecting the right flowers and considering seasonal factors, you can enhance your experience of preserving flowers naturally. Enjoy the beauty of your creations for years to come!
You have explored various methods for preserving flowers naturally, including air drying, pressing, using silica gel, sand drying, and resin preservation. Each technique offers unique benefits, allowing you to maintain the beauty of your favorite blooms. Preserved flowers not only enhance your decor but also contribute to your emotional well-being. Studies show that flowers can calm your mind, reduce stress, and inspire creativity.
Consider using your preserved flowers in creative projects like floral coasters, dried flower lights, or DIY pressed flower art. These beautiful creations can keep your memories alive while adding a personal touch to your home. Embrace the joy of preserving flowers naturally and enjoy the lasting beauty they bring to your life.
FAQ
What is the best method for preserving flowers?
The best method depends on the type of flowers you have. Air drying works well for sturdy blooms, while silica gel preserves delicate flowers’ colors and shapes. Choose a method that suits your flowers’ characteristics.
How long do preserved flowers last?
Preserved flowers can last for years if you store them properly. Resin-preserved flowers can last over 20 years, while air-dried or pressed flowers may fade over time. Keep them away from direct sunlight and humidity.
Can I preserve flowers from my garden?
Yes, you can preserve flowers from your garden! Ensure you pick them at their peak freshness. Follow the preservation method that best suits the flowers you choose for optimal results.
Are there any flowers that don’t preserve well?
Some flowers, like peonies and poppies, tend to wilt quickly and lose their shape. Avoid using flowers with thick petals or high moisture content. Opt for sturdier varieties for better preservation results.
How can I display my preserved flowers?
You can display preserved flowers in various ways. Consider using shadow boxes, frames, or resin molds. Create beautiful arrangements or incorporate them into crafts like bookmarks or coasters for a personal touch.