Growing raspberries from seed can feel deeply rewarding and is surprisingly simple with the right steps. A gardener collects ripe berries, gently extracts and cleans the tiny seeds, then breaks dormancy with a cold moist period in the refrigerator. Next the seeds go into a fine sterile mix, only lightly covered, kept evenly moist under a humidity dome and given steady warmth plus 14 to 16 hours of light. Seedlings are thinned, moved into larger pots after true leaves appear, hardened off slowly, and then planted in sunny, well drained soil with mulch to hold moisture and protect roots, and a little patience will bring sweet results that keep improving each season.
Why Grow Raspberries From Seed
Growing raspberries from seed offers a quiet kind of satisfaction that comforts the gardener and sparks gratification. The gardener learns patience and skill as seeds become seedlings and then fruiting canes.
In home gardening this path builds profound insight of plant habits, soil needs, and seasonal timing. Each step rewards careful observation and steady care.
Growing from seed also promotes genetic diversity in the patch, which can strengthen resilience to pests and weather. That diversity invites experimentation and learning, and it keeps routines interesting over years.
The gardener who values expertise will enjoy tracking traits, selecting stronger seedlings, and documenting results. This work connects hands, mind, and garden in a calm, confident practice that feels both personal and purposeful.
Choosing the Right Raspberry Variety
Choosing the right raspberry variety begins with matching the plant to the local climate and hardiness zone so it can survive cold winters and hot summers.
Next, the intended fruit type and uses should guide the choice because some varieties produce firm berries for freezing and baking while others offer sweet, tender fruit for fresh eating.
Through linking climate needs with fruit use, a gardener can pick a variety that feels satisfying to grow and useful at harvest.
Climate and Hardiness
Residing in a certain climate shapes which raspberry varieties will thrive, so a gardener should match plants to local temperatures and seasonal patterns. A careful grower studies cold tolerance and uses microclimates mapping to place seedlings where they will survive hard winters and late frosts. Practical attention to winter minimums and summer heat informs seed selection. Planting near a south wall, under taller trees, or in raised beds changes exposure. The following table helps refine choices and shows factors to weigh whenever selecting seed strains and nursery stock.
| Zone range | Winter strategy | Location tip |
|---|---|---|
| 3 to 4 | deep mulch | sheltered nook |
| 5 to 6 | row covers | raised bed |
| 7 to 8 | shade in heat | morning sun |
| 9+ | drought plan | drip irrigation |
Fruit Type and Uses
Often a gardener will weigh fruit type and planned uses initially, because those choices shape every other decision about variety and care.
A grower seeking Heritage flavors will choose older cultivars known for depth and aroma. Those varieties often shine fresh, in preserves, and whenever paired with simple desserts.
In case canning and Commercial yields matter, a gardener will favor productive, firm-fruited cultivars that stand up to handling. For jam, choose high pectin lines or mix with added pectin. For fresh eating, pick tender, aromatic types and plan harvest timing to savor peak flavor. For frozen fruit, select varieties that retain texture after thawing.
Consider dual-purpose varieties whenever space is limited. Shift choices into pruning and feeding to support the selected use.
Collecting and Preparing Raspberry Seeds
Once ripe berries are handled gently, seed collection becomes a small, satisfying ritual that connects a gardener to the next season. The gardener loosens drupelets, separates seeds, and applies careful seed cleaning techniques to remove pulp and fermentation residue. Attention to cleanliness prevents mold and preserves vigor. Next, drying proceeds slowly on paper in a cool, shaded spot. Proper seed storage tips follow: airtight containers, labeled with variety and date, placed where temperature is steady and humidity low. The process is methodical and calming and builds confidence for future sowing.
| Step | Purpose | Detail |
|---|---|---|
| Harvest | Capture mature seed | Pick fully colored berries |
| Clean | Remove debris | Rinse, sieve, ferment briefly |
| Store | Preserve viability | Dry, label, airtight jar |
Seed Stratification and Pre-Treatment
With patience and a little care, raspberry seeds need a short period of pretreatment to wake them from dormancy and encourage steady germination.
The gardener approaches stratification deliberately, using cold moisture to mimic winter and break physiological rest. Seeds rest in damp medium inside a sealed bag in a refrigerator for the recommended interval.
Some practitioners pair this with gentle chemical scarification to soften the seed coat before chilling, improving water uptake. Both techniques must be controlled and timed precisely to avoid damage.
- Monitor temperature and humidity during cold moisture stratification.
- Apply mild chemical scarification only once seed coat is particularly hard.
- Rinse seeds thoroughly after scarification and before chilling.
These steps work together and prepare seeds for reliable sprouting.
Starting Raspberry Seeds Indoors
After cold stratification, the gardener carries the prepared seeds inside and sets up a cozy starting station for the tiny plants.
The gardener places seeds in a fine, sterile mix and covers them lightly.
They position trays under grow lights to give steady, gentle illumination and set the timer for 14 to 16 hours daily.
A humidity dome sits over the trays to keep moisture consistent and reduce stress.
The gardener watches for even warmth and avoids waterlogged soil.
Once cotyledons appear, the dome comes off slowly to harden seedlings.
They raise the lights as stems grow and rotate trays for even development.
The gardener prunes weak sprouts and transplants sturdy seedlings into larger pots after true leaves are established and roots fill the container.
Direct Sowing Raspberry Seeds Outdoors
For gardeners choosing to sow raspberry seeds directly outdoors, selecting a sunny site with well drained, slightly acidic soil is the initial caring step that sets plants up for success.
Timing matters too; sowing after the last hard frost and placing seeds just beneath a thin soil layer helps them germinate without being smothered.
These soil and timing choices work together to give seedlings a gentle start and reduce initial setbacks for a hopeful grower.
Site Selection and Soil
Choosing the right spot can make planting raspberry seeds outdoors feel less like a gamble and more like a promise kept. The gardener seeks a site with full sun for strong canes and reliable fruit.
Soil must drain well yet hold moisture. Raised beds help control texture and warmth while keeping roots healthy. Good soil mixes include compost and coarse sand or fine grit to improve structure.
- Test soil pH and aim for slightly acidic to neutral.
- Improve clay or heavy soil with organic matter and grit.
- Place beds where air moves but wind damage is unlikely.
These steps connect site choice and soil work. Together they set a stable foundation for confident, steady seedling growth.
Timing and Sowing Depth
As spring warmth reaches the soil and nights stay mostly frost-free, a gardener can plant raspberry seeds directly outdoors with patience and care.
For prime timing, choose a morning after the last frost date whenever soil is workable and slightly warm. Plant once daytime temperatures regularly reach the mid 50s to 60s Fahrenheit to encourage steady germination.
For sowing depth, press seeds into fine, firmed soil and cover lightly with 1/8 to 1/4 inch of mix. This shallow placement gives light access while protecting seeds from drying and birds.
Space rows to allow air and future pruning access. Water gently and keep soil evenly moist but not soggy.
Monitor for pests and thin seedlings to the strongest plants. Adjust timing and depth based on local microclimate.
Caring for Raspberry Seedlings
As seedlings initially break the soil, gentle attention makes a big difference in whether they thrive or struggle.
A grower checks light requirements first, placing trays where morning sun warms but fierce afternoon sun is buffered.
Watering is steady and measured so roots expand without flooding.
Mulching timing matters once true leaves appear; a thin organic layer keeps moisture steady and cools roots while preventing crusting.
- Monitor moisture daily and adjust to avoid soggy media.
- Thin seedlings to prevent crowding and improve air flow.
- Feed lightly after true leaves form with a balanced dilute fertilizer.
Care involves watching for pests and disease and acting promptly.
Calm, patient care builds confident, resilient plants ready for the first stage.
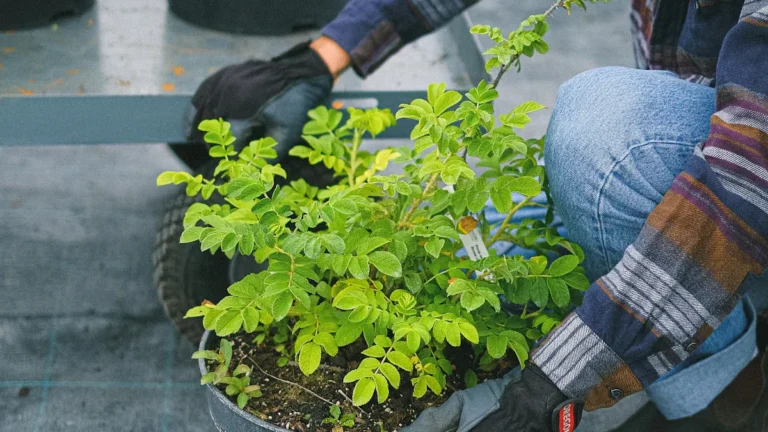
Transplanting Seedlings to the Garden
Carefully moving raspberry seedlings into the garden marks a big step that brings hope and a little nervousness, and a gentle plan helps both plant and gardener feel ready.
The gardener inspects roots, then considers light and soil before digging.
Root pruning is used if roots circle the pot; trimming a few outer roots encourages new branching and steadier establishment.
Plant at the same depth as in the pot, firm soil gently, and water to settle air pockets.
Begin shade acclimation by placing seedlings in filtered light for several days, afterwards increase sun exposure gradually.
Protect young plants from wind and hungry critters.
Mulch to retain moisture and suppress weeds.
Check daily at outset, adjust water and support, and trust steady hands and careful attention.
Troubleshooting Common Seed-Growing Problems
Moving seedlings from pots into the garden is a relief, but new problems can still appear and a gentle plan helps a gardener respond without panic. A confident grower initially checks soil and plant signs, then isolates issues to act precisely. Crucial steps combine pest identification and irrigation review so actions stay calm and effective.
- Inspect leaves and stems daily to spot pests promptly and record symptoms for correct pest identification.
- Reassess the watering schedule, aim for consistent moisture without saturation, and adjust for weather and mulching.
- Amend soil structure where roots lag, use gentle pruning to remove damaged growth, and stake unstable plants.
These steps link diagnosis to remedy, so problems are fixed efficiently and learning deepens.