Mulberry trees bring beauty and fruit but can also present challenges that catch many off guard. From fruit dropping in excess to pests like gall wasps altering leaves, these issues test a gardener’s patience.
Nearby diseases such as fire blight add complexity, while problems like powdery mildew and herbicide damage require careful attention. Grasping these common concerns and how to manage them helps keep mulberries healthy and productive, inviting a closer look at practical steps for care and recovery.
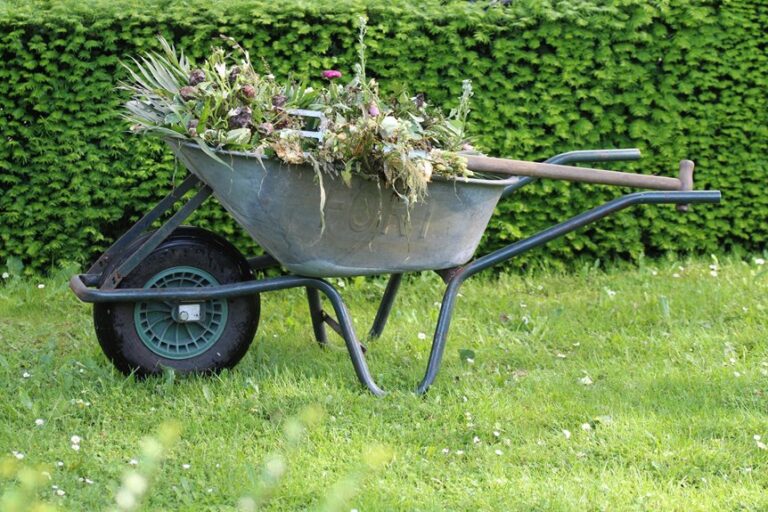
Mulberry Fruit Overabundance and Cleanup
Mulberry trees can produce a surprising amount of fruit, especially during a good season, and this abundance often creates a sticky challenge for those residing nearby. The fallen berries can cling to pets’ paws and stain patios, leading to headaches for homeowners. To tackle this, collecting the fruit promptly is key.
Utilizing mulberry composting methods turns excess into nutrient-rich soil, preventing weed growth sparked via rotting fruit. For those facing neighbor dispute resolutions over messy yards, clear communication about cleanup plans helps ease tensions. Regular sweeping and netting trees during peak fruiting also reduce debris.
While the fruit offers delicious homemade jams or wines, consistent maintenance turns a potential nuisance into an opportunity, blending practical care with community harmony during Richmond’s bumper crop seasons.
Dealing With Jumping Oak Gall Wasp Infestations
Jumping oak gall wasps create small round growths called galls on oak leaves and twigs, which can make the foliage look wilted and blackened. Spotting these galls promptly helps keep an eye on the tree’s health and catch problems before they get worse. Managing stress through watering well and protecting the tree from extra damage supports its natural ability to recover from these pesky insects.
Gall Wasp Identification
How can you tell whether an oak tree is hosting a gall wasp infestation? Look closely for small, woody, round galls—up to one inch wide—that cluster on leaves, branches, and twigs. These growths result from specific gall wasp species like Callirhytis quercusnegundo, which lay eggs in oak tissues, triggering abnormal development.
Infestation patterns vary yearly, with some seasons showing heavy gall presence, often accompanied by wilted or blackened leaves signaling stress. Although mature oaks usually withstand these galls, spotting them in advance helps monitor the tree’s health. Noticing these signs allows caretakers to track infestation cycles and prevent complications such as secondary infections.
Knowing gall wasp identification is essential for managing affected trees wisely before moving on to stress management strategies.
Tree Stress Management
Often, coordinating stress in white oak trees infested through gall wasps requires a gentle and steady approach. These wasps cause galls that disrupt nutrient flow, stressing the tree and leading to wilted, blackened leaves. Supporting the tree’s recovery involves reducing other pressures. Key strategies include:
- Adjusting soil pH to optimize nutrient availability and root health
- Applying drought resistant mulching to maintain moisture and reduce water stress
- Monitoring tree health regularly to catch initial signs of decline
- Avoiding unnecessary chemical sprays that could harm beneficial predators
This supportive care helps white oaks withstand severe gall infestations while natural predators gradually reduce wasp numbers. Through focusing on soil conditions and moisture management, arborists help trees regain vigor, ensuring survival through challenging seasons.
Recognizing and Managing Fire Blight in Pear Trees Nearby
Fire blight is easy to spot as you see blackened leaves and branches with dead leaves still hanging on pear trees nearby. While it doesn’t usually kill the trees, it can make them look scorched and unhealthy. Managing fire blight means acting sooner with treatments during bloom and carefully cleaning pruning tools to stop the disease from spreading.
Fire Blight Identification Signs
What clues reveal the presence of fire blight in pear trees nearby? Detecting the signs initially aids grasp bacterial dissemination processes and the function of antibiotic opposition elements in handling this ailment.
Observe these unique indicators:
- Blackened leaves and branch tips that look burnt, often with lifeless leaves still attached.
- Wilting and darkening of shoots, blossoms, and young fruit following flowering.
- A “shepherd’s crook” shape in contaminated shoots due to wilting.
- Quick dissemination in mild, damp environments, frequently transported via insects, precipitation, or tainted instruments.
These indicators denote fire blight triggered by Erwinia amylovora Through identifying the particular blackened, wilted look and comprehending bacterial movement, one might foresee essential handling measures more proficiently.
Treatment and Prevention Steps
Detecting the initial indications of bacterial harm in pear trees close by aids in implementing swift measures to safeguard mulberry trees from contamination. Pruning infected branches 8-12 inches below symptoms during dry conditions, using tools sanitized in a 10% bleach solution, stops bacterial spread. Applying copper-based bactericides at bud break further protects nearby mulberry trees. Avoiding overhead watering and opting for drip irrigation reduces humidity, limiting fire blight’s growth. Regular removal of infected debris disrupts the disease cycle. Enhancing soil testing for nutrient balance guarantees tree resilience, while companion planting with beneficial species promotes natural disease suppression.
| Treatment Steps | Prevention Measures |
|---|---|
| Prune infected branches | Apply copper-based bactericides |
| Sanitize tools before each cut | Use drip irrigation over overhead |
| Remove infected debris in fall | Companion planting with beneficial species |
Impact on Pear Trees
A common challenge in gardens where pear trees grow near mulberries is the spread of a bacterial disease that causes blackened, wilted leaves and scorched-looking branches. Fire blight enters pear trees through blossoms or wounds, thriving in environments where shading effects from mulberries increase humidity. Soil nutrient competition between these trees can also weaken pear defenses, making infection more likely. Managing fire blight requires careful steps:
- Prune infected branches 8-12 inches below symptoms using sterilized tools
- Avoid overhead watering to reduce moisture that favors bacteria
- Choose resistant pear cultivars like Harrow Sweet or Moonglow to lower infection risk
- Monitor for wilted, blackened leaves and remove affected parts promptly
These practices help maintain pear tree health even during times mulberries create challenging conditions nearby.
Identifying and Treating Powdery Mildew on Mulberry Leaves
Often, mulberry leaves show signs of powdery mildew during humid weather, presenting as a fine, white dusting that can catch any gardener’s eye. This fungal growth thrives if environmental causes of powdery mildew, such as high humidity and poor airflow, create perfect conditions on foliage.
To manage this, cultural practices for prevention are essential. Ensuring mulberry trees receive ample sunlight and are pruned to promote air circulation reduces moisture buildup. Avoiding overwatering and maintaining well-drained soil also helps limit mildew’s spread.
Prompt identification involves inspecting leaves for the distinctive powdery coating, differentiating it from other leaf issues. Applying neem oil or sulfur-based fungicides at the bud break stage can stop the fungus before it worsens.
These methods keep mulberries healthy without unnecessary chemicals, supporting sustained growth and beauty.
Preventing and Repairing Herbicide Damage
Caused through herbicide drift, damage to mulberry trees can show up quickly with symptoms like curled leaves, yellowing, and slowed growth. Preventing harm begins with careful buffer zone planning, keeping sprays at least 10-15 meters away from mulberries. Regular soil testing for herbicide residues helps detect contamination initially, safeguarding root health. Manual weed control methods such as pulling or cutting weeds reduce chemical risks. To aid recovery, prune damaged branches in late winter and watch for pests attracted to stressed trees. Deep watering every 7-10 days and applying organic compost supports detoxification and regrowth. Key prevention and repair steps include:
- Establishing and respecting buffer zones during herbicide application
- Conducting soil testing for harmful residues
- Using manual weed control to avoid soil contamination
- Pruning and monitoring health post-exposure for full recovery
Correct Watering Practices for Healthy Mulberry Trees
Maintaining healthy mulberry trees after managing herbicide damage involves careful attention to watering habits. Young trees need consistently moist soil, but it should never be soggy, to prevent root rot. For established trees, deep watering every 7 to 10 days during dry periods encourages strong roots and overall resilience.
Using slow-release methods like 20-gallon watering bags guarantees steady hydration without overwatering. Before watering, checking soil moisture 15 to 20 centimeters deep helps avoid fungal problems. Proper watering complements winter care tips and effective fertilizer selection, as both influence root strength and nutrient uptake.
Improving soil drainage with compost also supports balanced hydration. These thoughtful watering practices keep mulberries thriving and ready to produce abundant fruit while minimizing stress from environmental challenges.
Pruning Techniques to Encourage Growth and Fruit Production
Pruning mulberry trees during late winter or initial spring sets the stage for dynamic growth and a fruitful season.
Following a winter pruning schedule helps remove dead, weak, or crossing branches, enhancing airflow and sunlight exposure.
This spring growth stimulation encourages robust fruit production on second-year wood.
Key pruning strategies include:
- Thinning overcrowded limbs to boost fruit bud development
- Cutting back the main trunk to promote a bushy, multi-stemmed shape
- Removing branches that inhibit light penetration or restrict airflow
- Regularly shaping to increase fruit yield by up to 20 percent
These techniques not only improve tree manageability but also foster healthier, juicier harvests.
Supporting pruning with deep watering ensures the tree recovers well and sustains vigorous growth throughout the season.
Seasonal Care Tasks to Maintain Tree Vitality
Typically, mulberry trees respond best to care that changes with the seasons, matching their natural growth cycle and environmental needs. In spring, effective soil preparation includes applying a balanced slow-release fertilizer and pruning to encourage growth and airflow. This sets the stage for strong development.
As summer arrives, deep watering every 7 to 10 days supports hydration, especially during dry spells. Moving into fall, clearing fallen fruit and leaves while reducing watering helps prepare the tree for dormancy. Winter frost protection becomes essential for young trees, achieved by mulching around the base with organic material to shield roots from cold damage. These seasonal tasks work together seamlessly, ensuring mulberry trees remain lively, healthy, and productive throughout the year without common setbacks like root rot or leaf spot.
Common Pest Problems and Organic Control Methods
Mulberry trees often attract a variety of pests that can challenge their health and appearance. Managing these issues effectively relies on Integrated Pest Management principles emphasizing monitoring and Beneficial Insect Attraction to naturally reduce harmful insects.
Key organic strategies include:
- Use strong water sprays to dislodge aphids, scale insects, and spider mites initially, preventing damage.
- Apply neem oil weekly to control whiteflies and mulberry leaf weevils without harming pollinators.
- Spray sulfur-based fungicides or a baking soda solution bi-weekly to combat powdery mildew in humid conditions.
- Install physical barriers or use garlic and hot pepper repellent sprays every two weeks to deter deer browsing on young growth.
Maintaining good airflow through pruning complements these methods via reducing pest-friendly environments, lowering the need for chemical treatments.
Harvesting Mulberries and Creative Uses for the Fruit
Harvesting mulberries at just the right moment guarantees the sweetest taste and easiest picking, as fully ripe berries turn deep purple and fall off stems with little effort.
Handling the delicate fruit carefully helps prevent stains and keeps berries fresh longer, whether stored in the fridge or frozen for future recipes.
Once gathered, mulberries can brighten up smoothies, salads, and desserts, or even be changed into homemade jams and wines, making the most of their rich, natural flavor.
Optimal Harvest Timing
Often, the best moment to pick mulberries arrives during the time the fruits have turned a rich, deep purple and slip off the stems with little effort. This deep purple ripeness signals peak flavor and maximum juiciness, especially noticeable in black mulberry superiority, where the balance of sweetness and tartness shines. Harvesting typically spans 6–8 weeks from mid-spring to late summer, varying by cultivar and location. To maximize efficiency and quality, consider these tips:
- Gently shake branches over a tarp to catch ripe berries without bruising.
- Harvest frequently to avoid overripe fruit falling and spoiling.
- Choose mulberries that detach easily to guarantee peak ripeness.
- Store picked berries in cool conditions promptly to preserve freshness and flavor.
These methods help access the full potential of mulberries for creative culinary uses.
Fruit Handling Tips
Picking mulberries at just the right moment means the work is only half done. After harvesting fully ripe berries that detach easily, careful handling is key since their juice stains skin and fabric. Employing proper mulberry storage methods preserves freshness; refrigerate berries for a few days or freeze them to extend usability.
Post harvest processing can include drying the fruit in a dehydrator at 135°F for 8 to 12 hours, preserving antioxidants and flavor for up to a year. Alternatively, cooking mulberries with sugar and lemon juice creates delicious jams. Each step from picking to storing and processing demands attention to maintain quality and reveal the fruit’s full potential. These practices help convert your harvest into enjoyable treats without waste or spoilage.
Culinary Uses
Mulberry fruits develop gradually over several weeks from mid-spring to late summer, offering a sweet reward for careful attention. Harvesting requires gentle hand-picking or lightly shaking branches over a sheet to avoid damage. Mulberries boast impressive nutritional benefits, rich in vitamin C, iron, and antioxidants, making them a versatile addition to any kitchen. Creative culinary uses and preservation techniques extend their enjoyment well beyond harvest season:
- Eat fresh mulberries raw or add them to smoothies, salads, and yogurt for natural sweetness
- Freeze berries on a baking sheet, then store airtight for up to 12 months without losing flavor
- Prepare jams, jellies, or pies using crushed berries combined with sugar and pectin
- Dry mulberries for trail mix or tea, or ferment them into a rich, fruity wine
These methods reveal the full potential of mulberries throughout the year.