
The idea of starting a garden fills many with excitement, but it can also feel overwhelming. You might worry about common pitfalls, yet the good news is that 82% of gardeners surveyed reported success, with most being beginners. To truly thrive, you need to understand essential tools, proper soil preparation, and effective planting techniques.
This guide will simplify these crucial steps for how to start a garden, empowering you to cultivate a flourishing space from the ground up.
Key Takeaways
Gather essential tools like a Hori Hori knife and a spade. These tools help you dig, plant, and prepare your garden easily.
Prepare your soil well. Test your soil to know its type and pH. Add compost to make it rich and healthy for plants.
Choose the right plants for your garden. Think about sunlight, soil type, and how much care they need. You can start with seeds or buy small plants.
Plant your garden carefully. Water seedlings before and after planting. Give plants enough space to grow big and strong.
Keep your garden healthy with ongoing care. Water plants regularly. Control weeds and manage pests. Use organic fertilizers to feed your plants.
Essential Tools for How to Start a Garden
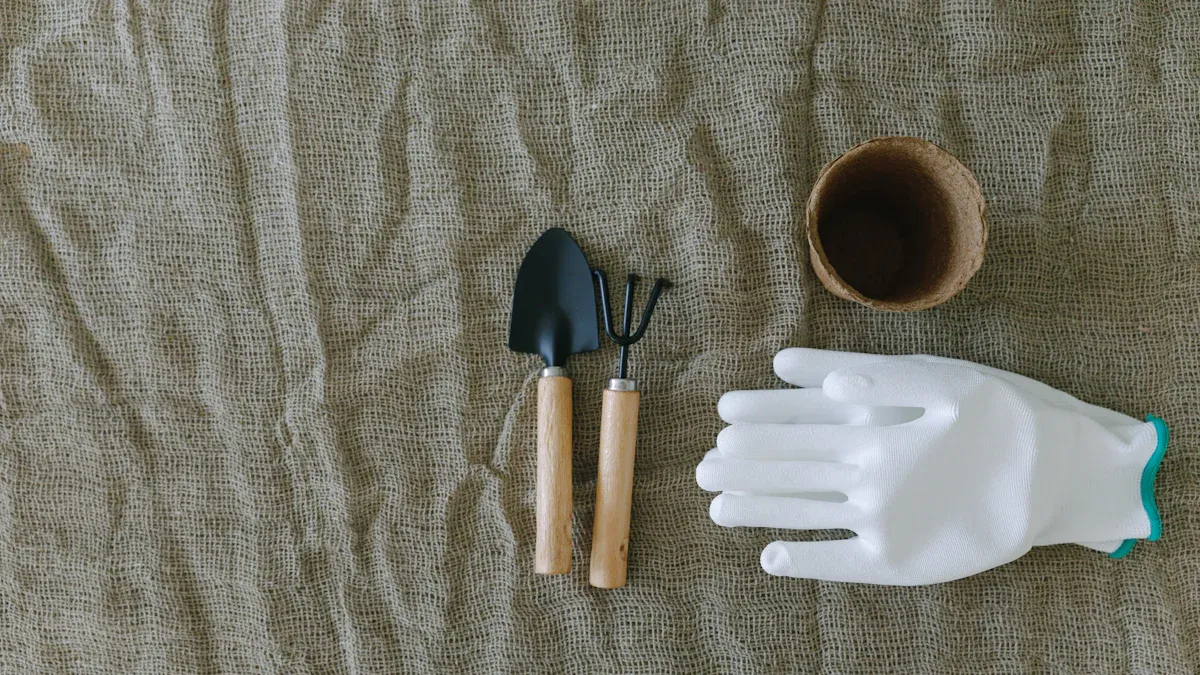
Starting your garden requires the right equipment. These fundamental tools make your gardening tasks efficient and enjoyable. You will find these items crucial for every step of your gardening journey.
Hand Tools for Detailed Work
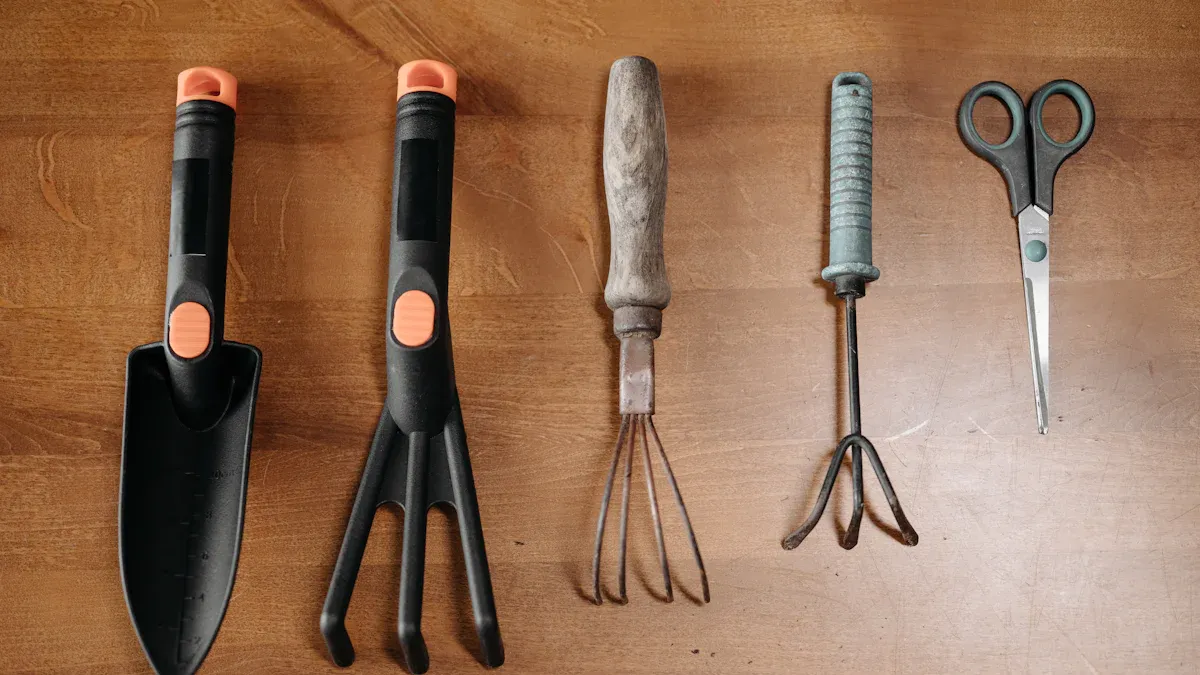
You need specific hand tools for precise tasks. A Hori Hori Knife is very versatile. You can use it for digging in hard soil, cutting roots, and measuring soil depth. It helps with weeding, trenching, and harvesting root vegetables.
A Transplanting Knife is more specialized. Its offset blade helps you move plants without harming delicate roots. You will also need a Hand Trowel for planting, digging, and mixing soil. A compact Garden Fork helps aerate compost and loosen soil. Use a Weeder to remove unwanted plants.
Pruning Shears are essential for trimming branches and stems. Bypass pruners, like those from ARS or Felco, are highly recommended. Always wear Gloves to protect your hands from blisters, cuts, and thorns. Non-slip waterproof gloves offer extra grip, and leather gloves work well for heavy tasks.
Larger Tools for Ground Prep
Larger tools help you prepare the ground. A full-size Garden Fork is excellent for turning soil and digging into dense ground. Forks with straight tines work best in compacted or clay soil.
A Spade is a versatile tool. You use it for digging holes, edging, and moving small amounts of dirt. Look for spades with treads on the blade for better use. A Rake helps you clear leaves and debris, preparing your garden bed. A Hoe is crucial for preparing garden beds and managing weeds. A Wheelbarrow is indispensable. You use it to move soil, compost, and other heavy materials easily.
Watering Gear and Protective Items
Proper watering gear keeps your plants healthy. A Kink Control Plus Water Hose offers high strength and flexibility. An Oscillating Sprinkler covers large areas, up to 3,600 square feet. An ABS Water Spray Nozzle provides seven adjustable watering patterns. For smaller plants or indoor use, a Watering Can with a long spout is perfect.
You also need protective items. Outdoor Faucet Covers protect your outdoor faucets from freezing in winter. A Freeze Miser offers additional freeze protection for your spigots. These items ensure your garden infrastructure stays safe. This preparation is key for how to start a garden successfully.
Soil Preparation for Success
You need to understand and improve your garden’s soil for a successful garden. Good soil provides the foundation for healthy plant growth.
Know Your Soil Type
First, you must identify your soil type. Different types of soil have unique characteristics.
Soil Type | Characteristics | Management Tips |
|---|---|---|
Sandy Soil | Crumbles when rubbed; drains quickly. | Water little and often; add compost in late winter to seal in moisture. |
Clay Soil | Sticky, hard to dig, waterlogged when wet, hard and cracks when dry; retains water well, high in nutrients. | Turn in grit and compost to improve drainage. |
Loam Soil | Mix of clay and sand; forms a shape then falls apart when rubbed. | Avoid over-interfering to preserve structure and nutrients. |
Chalky Soil | Stony, drains well; can lead to nutrient deficiency (yellow leaves); slightly alkaline. | Add a 10cm layer of compost to replace lost nutrients. |
Silty Soil | Drains well, retains moisture; easier to dig than clay, more nutrient-dense than sandy soil; can become compacted, wears away easily. | Add grit and compost in autumn to maximize drainage and airflow. |
Peaty Soil | Wet, rich in organic materials; acidic (nutrients hard to break down); too wet to roll. | Add grit to improve drainage; feed soil to improve nutrient levels. |
You want a complex mixture for vegetable gardens, not a single type of soil. Loamy soil is often best. This soil type avoids the extremes of clay or sandy soils. It is fertile, well-drained, and easy to work. However, you can grow a successful garden in various soil types. The key characteristics for good garden soil include good drainage and a rich supply of nutrients. Your soil should contain minerals (sand, silt, clay), organic matter, living organisms, water, and air. Healthy soil is almost 50% water and air.
Soil Testing and pH Balance
You need to test your soil to understand its current condition. This helps you know what amendments to add. You can use home test kits from gardening centers, but these are less accurate. Professional lab testing offers more accurate and thorough results. Local county extension offices often provide this service for free or at a low cost.
To take a soil sample for testing, follow these steps:
Scrape away surface litter, plant residues, or leaves.
Avoid sampling areas where ashes, manure, compost, or brush have been present.
Cut a V-shaped hole 6 to 8 inches deep with a shovel or trowel.
Take a 1-inch wide slice of soil from the length of the hole. Then, take a 1-inch strip from the center of this slice for your sample.
Repeat this process randomly across the garden. Mix all samples in a clean jar or bucket.
Measure out a cup of soil. Dry it indoors for a few days. Seal it in a plastic bag with your information.
Send the sample with the required forms and fees.
Most garden crops prefer a soil pH around 7. Specifically, an optimal pH range is between 6.0 and 7.0. A pH level of about 6.5 is ideal for most garden plants. Some plants, like blueberries, prefer more acidic conditions. Others, such as asparagus, thrive in more alkaline soil.
Amending Soil for Fertility
You must amend your soil to improve its fertility and structure. Compost is a nutrient-rich organic material. It improves soil structure, enhances moisture retention, promotes microbial activity, and provides essential nutrients.
Compost offers many benefits:
Improves Soil Structure: Compost enhances drainage in clay soils. It boosts water retention in sandy soils. It helps form aggregates, creating spaces for air circulation, water drainage, and easier root penetration. This leads to deeper root systems.
Adds Nutrients: Mature compost contains small amounts of primary nutrients like phosphorus, potassium, and nitrogen. It also provides essential micronutrients like copper, zinc, iron, and manganese.
Adds and Attracts Beneficial Microbes: Compost hosts and nurtures various microorganisms. These microbes improve soil structure. Some help reduce plant diseases. Others establish mycorrhizal fungi, allowing plants to access nutrients beyond their root reach.
Helps Balance pH: Compost can balance soil pH levels. It makes acidic soil more alkaline and alkaline soil more acidic. It achieves this by boosting the cation exchange capacity (CEC) of the soil. This measures its ability to retain nutrients and make them available to plants.
Other organic materials you can use to amend your soil include:
Animal manure (use well-aged or composted manure)
Composted plant material (leaves, cotton burrs, hay, straw)
Leaf mold (chopped, composted leaves)
Peat moss or coco coir (coco coir is a more sustainable alternative to peat moss)
Biochar (made by burning organic matter)
Pine bark fines (finely shredded product that retains moisture and is very acidic)
Sawdust (only use well-decayed sawdust)
For raised beds, you can create an ideal soil blend. A recommended organic sandy loam mix, called the ‘103 blend,’ consists of equal parts topsoil, coarse sand, and compost. This blend should be dark, moist, and hold together without being too compact. It should retain water sufficiently for plants to absorb it.
Clearing and Loosening the Ground
Before planting, you need to clear and loosen the ground. This prepares the soil for new plants.
First, clear the area of debris:
Begin by cutting back brush and small trees. Use heavy-duty lopping shears to cut small growth close to the ground. Ensure no sharp stubs remain.
Clear the surface of any rocks larger than a hen’s egg. Walk the area and mark the locations of any rocks. To assess rock size, strike it with a crowbar. A high-pitched ‘DING’ suggests a large rock needing digging or pulling. A duller sound indicates it is likely removable with a shovel or by hand.
Mow down grass or cut back weeds to ground level. Remove any remaining weeds. You can chop them with a hoe or mattock and rake them up.
Next, loosen the soil. For a first-time garden, you should loosen the soil to at least 8 inches. For very compacted, fine-textured, or heavy soils, or where a hardpan layer exists, ‘double digging’ is recommended. This method loosens the soil to two spade depths, which can be about two feet.
For shallow raised beds, if the soil is dense, compacted, or poorly drained, loosen it with a broad or pitch fork. Plant roots can grow 6 inches or more, so you want to provide ample space. Loosening the soil to a depth of 18 inches creates well-aerated and nutrient-dense soil.
Planting Your Garden: Key Tips
You have prepared your soil. Now you are ready to plant your garden. This section guides you through selecting plants, deciding between seeds and seedlings, and using effective planting techniques.
Selecting the Right Plants
Choosing the right plants is a crucial step for your garden. You need to consider several factors. These factors ensure your plants will thrive.
Function/Purpose: Think about why you want a plant. Do you need shade? Do you want to create a screen? Are you trying to control erosion? Plants can serve architectural, engineering, and environmental roles in your garden.
Aesthetics: Consider the plant’s overall look. This includes its shape, leaves, flowers, fruit, and bark. These elements contribute to beautiful and artistic displays in your garden.
Site Adaptability: Make sure the plant will grow well in your specific conditions. This means looking at cold hardiness, soil type, sun exposure, and light levels. The saying “Don’t fight the site” means you should choose plants that match your existing environment.
Management: Think about how much work the plant needs. This includes pruning, fertilizing, watering, and pest control. Good management keeps your plants healthy and looking good over time.
Your planting site’s soil content is very important. It can change a lot even on one property. You might find different amounts of clay, sand, stone, or loam. Most plants prefer soil that drains well, stays moist, and is slightly acidic. If you have clay soil, add organic matter. This improves drainage and helps the soil hold moisture. It also helps plants handle very hot or cold temperatures.
Temperature also affects plant choice. The USDA assigns hardiness zones based on average minimum winter temperatures. These zones help you pick plants that can survive your local winter. Microclimates are small areas, like a sheltered spot near your house. They can be warmer. This allows some plants to grow outside their typical zones.
Sun exposure is another key factor. Plants have different needs:
Full sun: They need 6 or more hours of direct sunlight.
Part sun: They need 2 to 6 hours of direct sunlight.
Part shade: They need 2 to 3 hours of dappled or filtered sun.
Shade: They need less than 2 hours of direct sun. Morning sun is less intense and cooler. Southern and western sun is hotter.
Seeds vs. Seedlings
You can start your garden from seeds or seedlings. Each option has its own benefits and drawbacks.
Starting from Seeds
Advantages:
Greater Variety: You get a much wider selection of plants. Nurseries often have fewer choices.
Cost-Effective: Seeds are cheaper than buying ready-to-plant seedlings.
Gardening Satisfaction: You feel a great sense of accomplishment watching a plant grow from the very beginning.
Disadvantages:
Time-Consuming: Seeds need several weeks of daily care.
Space Requirements: You need a dedicated area for seeding trays and equipment.
Higher Loss Rate: It is a delicate process. More plants might not survive.
If you start seeds indoors, you control the environment. Seeds started indoors are safe from weather changes, competition from other plants, and pests. You manage all growing conditions, including organic materials. Once they grow, you can easily move seedlings to their final spot. However, you must consider seed size. This ensures you use the right container size and prevent root cramping. You must also provide all water, sunlight, and nutrients. Timing is critical. Seedlings must be ready after the last frost. Starting too early can lead to loss.
Planting Seedlings (Plant Starts)
Advantages:
Convenience: Seedlings are quicker and easier to plant than seeds.
Predictable Results: You have more control and more certain outcomes for your garden.
Immediate Gratification: You see plants in your garden quickly.
Disadvantages:
Limited Selection: There are fewer varieties of vegetables, flowers, and herbs available.
Higher Expense: Seedlings cost more than seeds.
Transplant Shock: Plants might wilt or die if you do not harden them properly before planting. This is less common with good nursery seedlings.
Plant starts grow faster. They have a shorter waiting period to reach maturity. You can buy the exact number of plants you need. This eliminates waste and simplifies space planning. They also need less initial care than seeds. You mainly monitor sun, water, and pests. However, plant starts cost more. The selection of specific varieties might be limited. They still need attention to sunlight and water to survive before you transplant them.
Effective Planting Techniques
Once you have your plants, you need to plant them correctly. Proper techniques ensure your plants establish well.
First, prepare your planting beds. Amend the soil as needed. You can add compost or humic acid. Smooth the surface. Lay out drip irrigation if you use it. You can also cover beds with a silage tarp for weeks or months. This warms the soil, kills weeds naturally, and improves soil structure. Remove the tarp when it has done its job. You will find weed-free, prepped soil ready for planting.
When transplanting seedlings, follow these steps:
Hydrate First: Water seedlings thoroughly a few hours before transplanting. This reduces stress.
Water the Beds: Hand-water rows before planting. This ensures even moisture, even if you have drip irrigation.
Plant During the Coolest Part of the Day: Early morning or late afternoon is best. This minimizes transplant shock.
Place Seedlings Carefully: Plant seedlings level with the soil surface. Handle roots gently. Some varieties, like tomatoes, benefit from deeper planting. Cabbage, broccoli, cauliflower, and kale may also benefit from deeper planting to stand more erect.
Secure Soil Around the Seedling: Lightly firm the soil. This eliminates air pockets and ensures good root-to-soil contact.
Water Again: Hand-water new transplants for the first week or two. This ensures strong establishment.
Protect If Needed: Use micro-tunnels for added protection. They shield plants from wind, temperature drops, or pests.
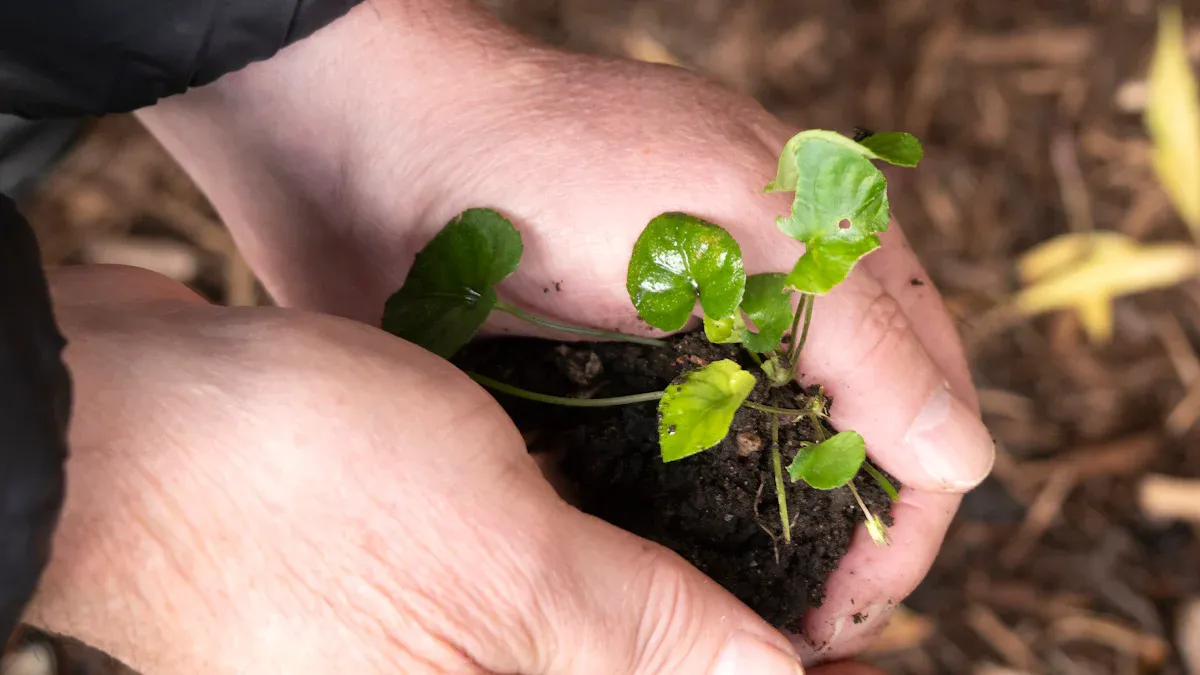
You can also remove plants from containers carefully. For small plants, use a “Star Trek sign” hand gesture. Support the stem. Invert the pot. Gently squeeze to release the root ball. If roots are circling, gently straighten them. This encourages a larger and deeper area for water and nutrient absorption. Create an opening in the dirt. You can use a trowel, butter knife, stick, or your fingers. Slide dirt around the sides to fill the opening. Ensure the plant stands upright. It should be at the same level as it was in the container. Water around the seedling. This establishes good contact between roots and soil. Support plants with large leaves with one hand while watering. This prevents them from falling over.
Ensure the soil in the seedling’s container is not dry. The plant should be well-hydrated and not stressed. The soil you plant into should be moist, but not wet or dry. Extreme conditions make digging difficult. The best time to transplant is during the cool of the late afternoon or evening. This allows roots to establish overnight before facing bright sunlight. In winter or on cloudy days, the time of day is less critical.
Consider plant spacing. You can use blocks or rows.
Planting Method | Examples of Crops |
|---|---|
Blocks | Beets, Carrots, Leafy greens, Garlic |
Rows | Potatoes (for hilling), Tomatoes (for staking and access), Peas (for ease of picking), Pole beans (for ease of picking) |
You can also maximize your space. Grow vertically. Use fences or trellises for vining plants like squash. This prevents them from sprawling. Avoid space hogs. These are crops that take up space all season with little yield. Examples include parsnips or Brussels sprouts. Minimize pathways. Design your garden with fewer or dead-end pathways. This maximizes your growing area. Try companion planting. Plant two compatible crops with different maturity rates in the same space. For example, plant radishes with carrots. You harvest one while the other grows. This also loosens the soil. Succession planting means you grow crops that you can harvest and replace with another crop in the same season.
Tips for Planting an Organic Vegetable Garden
A central idea of planting an organic vegetable garden is to make the soil healthy and productive for a long time. This means you encourage a good balance of minerals, animals, microbes, fungi, and plants in the soil. Organic gardeners focus on “feeding the soil.” Then the soil can feed the plants. This is different from traditional methods that focus on feeding the plants directly. This approach helps you create a successful organic garden.
Companion planting is a great strategy for planning an organic vegetable garden. It helps deter pests and improve plant growth.
Plant | Plant Near | Keep Away From | Comments |
|---|---|---|---|
Asparagus | Tomatoes, parsley, basil, marigolds, dill, cilantro, comfrey, strawberries | Onions, garlic, potatoes | Tomatoes deter asparagus beetles. Parsley, basil, dill, cilantro, and marigolds deter other pests. Comfrey improves soil. Strawberries are a good groundcover. |
Beans | Corn, squash, cucumbers, potatoes, carrots, cabbage, cauliflower, broccoli, Brussels sprouts, eggplant, peas, strawberries, celery, savory, marigolds, nasturtiums, rosemary | Onions, garlic, chives, peppers, fennel, gladiolus, kohlrabi, sunflowers | Corn provides a trellis. Squash shades the soil. Potatoes, carrots, and brassicas benefit from nitrogen. Savory deters bean beetles. Marigolds and nasturtiums deter pests. Rosemary deters bean beetles. |
Beets | Bush beans, lettuce, cabbage, kohlrabi, onions, garlic, mint, catnip, marigolds | Pole beans, mustard | Bush beans provide nitrogen. Lettuce shades the soil. Brassicas benefit from improved soil. Mint and catnip deter pests. Marigolds deter nematodes. |
Cabbage Family (broccoli, Brussels sprouts, cabbage, cauliflower, collards, kale, kohlrabi, mustard, radishes, turnips) | Potatoes, celery, dill, chamomile, mint, rosemary, sage, thyme, onions, garlic, marigolds, nasturtiums, borage, calendula, lettuce, spinach, chard, beets, carrots, radishes, parsnips, peas, beans | Strawberries, tomatoes, pole beans, rue, grapes, corn, fennel | Potatoes deter flea beetles. Celery deters cabbage worms. Dill, chamomile, mint, rosemary, sage, and thyme deter various pests. Onions and garlic deter aphids. Marigolds and nasturtiums deter pests. Borage deters cabbage worms and improves growth. Calendula attracts beneficial insects. Lettuce, spinach, and chard provide groundcover. Beets, carrots, radishes, and parsnips are good root companions. Peas and beans provide nitrogen. |
Carrots | Rosemary, sage, lettuce, radishes, onions, marigolds, calendula, dill, cilantro, parsley, chives, tomatoes, beans, peas, peppers, eggplant, potatoes, spinach, Swiss chard | Dill (can attract spider mites), fennel, celery (can stunt growth) | Rosemary and sage deter carrot rust flies. Lettuce and radishes loosen soil. Onions deter carrot rust flies. Marigolds deter nematodes. Calendula attracts beneficial insects. Dill, cilantro, parsley, and chives improve flavor. Tomatoes, beans, peas, peppers, eggplant, and potatoes are good general companions. Spinach and Swiss chard provide groundcover. |
Corn | Beans, squash, cucumbers, melons, pumpkins, potatoes, peas, soybeans, sunflowers, marigolds, nasturtiums, borage, dill, parsley, chives, lettuce, spinach, Swiss chard | Tomatoes, cabbage, broccoli, Brussels sprouts, cauliflower, kohlrabi, celery, fennel | Beans provide nitrogen and a trellis. Squash shades the soil. Cucumbers, melons, and pumpkins are good groundcovers. Potatoes benefit from shade. Peas and soybeans provide nitrogen. Sunflowers provide a trellis. Marigolds and nasturtiums deter pests. Borage deters corn earworms. Dill, parsley, and chives improve flavor. Lettuce, spinach, and Swiss chard provide groundcover. |
Cucumbers | Beans, corn, peas, radishes, sunflowers, marigolds, nasturtiums, borage, dill, oregano, lettuce, spinach, Swiss chard | Potatoes, sage, tomatoes, aromatic herbs (can stunt growth) | Beans and peas provide nitrogen. Corn and sunflowers provide a trellis. Radishes loosen soil. Marigolds and nasturtiums deter pests. Borage attracts beneficial insects. Dill and oregano improve flavor. Lettuce, spinach, and Swiss chard provide groundcover. |
Eggplant | Beans, peppers, tomatoes, potatoes, spinach, Swiss chard, marigolds, nasturtiums, thyme, catnip, borage | Fennel, walnuts | Beans provide nitrogen. Peppers and tomatoes are good general companions. Potatoes benefit from shade. Spinach and Swiss chard provide groundcover. Marigolds and nasturtiums deter pests. Thyme and catnip deter flea beetles. Borage attracts beneficial insects. |
Lettuce | Carrots, radishes, strawberries, cucumbers, onions, garlic, mint, marigolds, nasturtiums, dill, cilantro, parsley, chives, beans, peas, corn, tomatoes, peppers, eggplant, potatoes, spinach, Swiss chard | Cabbage, broccoli, Brussels sprouts, cauliflower, kohlrabi, celery, fennel | Carrots and radishes loosen soil. Strawberries are a good groundcover. Cucumbers provide shade. Onions and garlic deter aphids. Mint, marigolds, and nasturtiums deter pests. Dill, cilantro, parsley, and chives improve flavor. Beans, peas, corn, tomatoes, peppers, eggplant, potatoes, spinach, and Swiss chard are good general companions. |
Onions | Carrots, lettuce, cabbage, broccoli, Brussels sprouts, cauliflower, kohlrabi, beets, strawberries, tomatoes, peppers, eggplant, marigolds, chamomile, dill, parsley, chives, mint, savory | Beans, peas, asparagus, sage | Carrots deter carrot rust flies. Lettuce provides groundcover. Brassicas benefit from pest deterrence. Beets are a good root companion. Strawberries are a good groundcover. Tomatoes, peppers, and eggplant are good general companions. Marigolds deter nematodes. Chamomile, dill, parsley, chives, mint, and savory deter pests. |
Peas | Carrots, turnips, radishes, corn, beans, cucumbers, potatoes, spinach, Swiss chard, lettuce, marigolds, nasturtiums, mint, cilantro, dill, parsley, chives | Onions, garlic, gladiolus, chives, leeks, shallots, peppers | Carrots, turnips, and radishes loosen soil. Corn and beans provide a trellis. Cucumbers are good groundcovers. Potatoes benefit from nitrogen. Spinach, Swiss chard, and lettuce provide groundcover. Marigolds and nasturtiums deter pests. Mint, cilantro, dill, parsley, and chives improve flavor. |
Peppers | Tomatoes, carrots, onions, spinach, Swiss chard, lettuce, marigolds, nasturtiums, basil, oregano, rosemary, dill, parsley, chives, beans, peas, corn, eggplant, potatoes | Fennel, kohlrabi, apricots | Tomatoes, carrots, and onions are good general companions. Spinach, Swiss chard, and lettuce provide groundcover. Marigolds and nasturtiums deter pests. Basil, oregano, rosemary, dill, parsley, and chives improve flavor. Beans, peas, corn, eggplant, and potatoes are good general companions. |
Potatoes | Beans, corn, cabbage, broccoli, Brussels sprouts, cauliflower, kohlrabi, peas, spinach, Swiss chard, lettuce, marigolds, nasturtiums, horseradish, catnip, cilantro, dill, parsley, chives, basil, thyme, mint | Tomatoes, cucumbers, squash, pumpkins, sunflowers, raspberries, apples, cherries, carrots, fennel | Beans and peas provide nitrogen. Corn provides shade. Brassicas benefit from pest deterrence. Spinach, Swiss chard, and lettuce provide groundcover. Marigolds and nasturtiums deter pests. Horseradish deters potato beetles. Catnip deters flea beetles. Cilantro, dill, parsley, chives, basil, thyme, and mint improve flavor. |
Spinach | Strawberries, cabbage, broccoli, Brussels sprouts, cauliflower, kohlrabi, lettuce, radishes, carrots, beans, peas, corn, tomatoes, peppers, eggplant, potatoes, Swiss chard, marigolds, nasturtiums, dill, parsley, chives | Fennel, mustard | Strawberries are a good groundcover. Brassicas benefit from improved soil. Lettuce, radishes, and carrots are good root companions. Beans and peas provide nitrogen. Corn, tomatoes, peppers, eggplant, and potatoes are good general companions. Swiss chard is a good general companion. Marigolds and nasturtiums deter pests. Dill, parsley, and chives improve flavor. |
Strawberries | Bush beans, lettuce, spinach, thyme, borage, marigolds, nasturtiums, onions, garlic, chives, dill, parsley, cilantro, caraway, sage, rosemary, mint, catnip, comfrey | Cabbage, broccoli, Brussels sprouts, cauliflower, kohlrabi, tomatoes, potatoes, melons, pumpkins, squash, fennel | Bush beans provide nitrogen. Lettuce and spinach provide groundcover. Thyme, borage, marigolds, and nasturtiums deter pests. Onions, garlic, and chives deter aphids. Dill, parsley, cilantro, caraway, sage, rosemary, mint, and catnip improve flavor. Comfrey improves soil. |
Tomatoes | Carrots, onions, lettuce, spinach, Swiss chard, marigolds, nasturtiums, basil, oregano, rosemary, dill, parsley, chives, beans, peas, corn, peppers, eggplant, asparagus, borage, calendula, mint, catnip, comfrey | Cabbage, broccoli, Brussels sprouts, cauliflower, kohlrabi, potatoes, fennel, walnuts, apricots, dill (can attract spider mites) | Carrots, onions, lettuce, spinach, and Swiss chard are good general companions. Marigolds and nasturtiums deter pests. Basil, oregano, rosemary, dill, parsley, and chives improve flavor. Beans, peas, corn, peppers, and eggplant are good general companions. Asparagus benefits from pest deterrence. Borage and calendula attract beneficial insects. Mint, catnip, and comfrey deter pests and improve soil. |
Turnips | Peas, beans, carrots, radishes, lettuce, spinach, Swiss chard, marigolds, nasturtiums, mint, cilantro, dill, parsley, chives | Mustard, kohlrabi | Peas and beans provide nitrogen. Carrots and radishes loosen soil. Lettuce, spinach, and Swiss chard provide groundcover. Marigolds and nasturtiums deter pests. Mint, cilantro, dill, parsley, and chives improve flavor. |
Ongoing Garden Care
Maintaining a healthy garden requires continuous effort after planting. You will need to provide consistent care to ensure your plants thrive.
Consistent Watering Practices
Proper watering is crucial for plant health. You need to know when your plants require water. A simple method uses a tuna can. Remove the top from an empty tuna can, which is usually 1 inch deep. Sink it into the soil up to the rim. When the can fills, you have provided enough water for an average week without rain.
You can also use a rain gauge to measure weekly rainfall. Most plants need about 1 inch of water each week. If less rain falls, you must water more. Always check the soil moisture even after rain, as a quick sprinkle might only wet the top layer. For most in-ground plants, water if the soil is dry 2-3 inches below the surface. Container plants need water when the soil is dry 1 inch deep.
Watch for signs of incorrect watering.
Overwatering shows as yellowing leaves, often starting from the bottom. You might see dark green or purple veins, dark brown leaf tips, or drooping leaves. Stems and roots can become mushy. You might also notice fungus on the soil surface or a foul smell from root rot.
Underwatering causes leaves and branches to droop slightly. Leaves curl inward, and edges turn brown with a yellow ring. Eventually, the entire leaf and plant dry out.
Weed Control Strategies
Weeds compete with your plants for nutrients and water. You can use several organic methods to control them.
Tarping: Silage tarps block sunlight, killing germinated weed seeds. This creates a clean seedbed quickly.
Mulching: Materials like woodchips, leaf mold, or landscape fabric cover the soil. They block light and stop weed seeds from growing. Organic mulches also improve soil quality and hold moisture.
Clean Compost: Always use compost free of weed seeds. This prevents new weeds from entering your garden beds.
Embrace Weeds: Sometimes, allowing weeds to grow in empty beds can act as a natural cover crop. This keeps the soil covered and adds organic matter.
Pest Management Basics
Pests can damage your plants. You can manage them organically.
Prevention: Start plants from seed. Quarantine new plants. Maintain healthy soil. Install rodent protection. Ensure good airflow around plants.
Monitoring: Regularly check your plants for pests. Look under leaves for small insects like aphids or spider mites. Check nooks for mealybugs. Look under mulch for pill bugs.
Many natural predators help control pests.
Aphids: Ladybugs and lacewings eat aphids. Plant dill or fennel to attract them.
Beetles: Handpick beetles and drop them into soapy water. Use floating row covers or neem oil spray.
Caterpillars: Bacillus Thuringiensis (BT) is toxic to caterpillars. Encourage birds to visit your garden.
Grubs: Beneficial nematodes and milky spore target grubs in the soil.
Fertilizing for Plant Health
Plants need essential nutrients to grow strong. These include macronutrients like nitrogen, phosphorus, and potassium. They also need micronutrients such as iron, zinc, and boron. You can use organic fertilizers to provide these.
Plant-based Fertilizers: Compost, alfalfa meal, and cottonseed meal improve the soil and add nutrients.
Animal-based Fertilizers: Manure, fish fertilizer, and worm castings are rich in nitrogen. They are good for leafy crops. Bone meal provides calcium and phosphorus for roots and flowers.
Mineral-based Fertilizers: Greensand provides potassium. Limestone reduces soil acidity. Rock phosphate offers slow-release phosphorus. Epsom salt gives a quick boost of magnesium and sulfur.
You now have the essential foundation for how to start a garden. The right tools, well-prepared soil, and careful planting are your keys to success.
