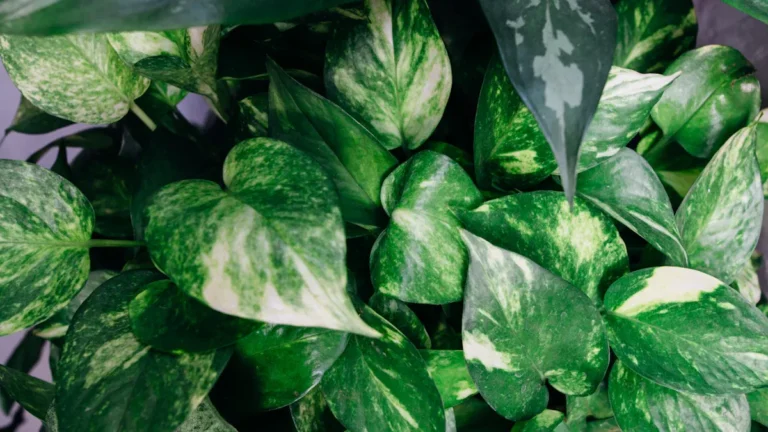
Checking the moisture level in a pot is a key step to keep plants healthy and happy. Using your finger to feel the soil’s dampness is a simple way to start. When the soil feels dry an inch down, it likely needs water, but when it’s still moist, waiting is better. For those who want more exact measurements, moisture meters offer clear readings to avoid over- or under-watering. Mastering these methods helps prevent common watering mistakes and supports thriving plants.
Why Monitoring Soil Moisture Matters
Keeping an eye on soil moisture is a key step in helping plants thrive. Soil moisture fluctuates with seasonal effects on evaporation, meaning water loss can speed up during hot, dry months and slow in cooler, humid seasons. Noting these patterns helps gardeners adjust watering schedules precisely.
Additionally, the impact of pot material plays an essential role—porous clay pots allow moisture to escape faster, while plastic pots retain water longer, affecting how often watering is needed. Identifying these factors prevents overwatering or underwatering, both harmful to plant health. Gaining soil moisture monitoring skills means balancing these variables with careful observation and knowledge, ensuring plants receive just the right amount of hydration for steady growth. This skill promotes healthier roots and more resilient plants over time.
Signs Your Plant Needs Water
Plants often give subtle clues as they’re thirsty, and noticing these signs can help keep them healthy. Leaves that wilt or droop, soil that looks dry or cracked, and slower growth or yellowing leaves often mean it’s time to water. Paying attention to these signals makes it easier to respond before the plant suffers.
Wilting or Drooping Leaves
Often, wilting or drooping leaves serve as a clear signal that a plant is thirsty and needs water. Environmental factors affecting wilting include heat, low humidity, and root damage, all of which reduce a plant’s ability to absorb moisture. Leaves droop, it’s the plant’s way of conserving water by minimizing surface area exposed to air.
To revive drooping plants, gently water the soil and proper drainage, avoiding both drought stress and waterlogging. Moving plants away from intense sunlight or dry air can also help. Sometimes, trimming dead or damaged leaves encourages new growth. Observing these signs closely allows for timely intervention, preventing further stress. Knowing how wilting relates to soil moisture levels bridges well into using finger or meter methods, which provide more precise knowledge into a plant’s hydration status.
Dry or Cracked Soil
As leaves droop, it often points to a plant’s need for water, but sometimes the soil itself offers clearer clues.
When soil becomes dry or cracked, it signals insufficient moisture, which can disrupt soil aeration effects essential for healthy root function.
Cracked soil often indicates that the potting mix drainage is working, but the water supply is inadequate or infrequent.
Such dryness can cause roots to struggle, as air pockets form where moisture once was.
Observing these soil conditions helps gauge when to water before plants show more obvious distress.
Recognizing dry, cracked soil early allows for timely hydration, ensuring roots remain well-aerated and the potting mix maintains proper moisture balance.
Paying attention to soil texture complements leaf observation, offering a fuller picture of a plant’s hydration needs.
Slow Growth or Yellowing
A noticeable slowdown in growth or the appearance of yellowing leaves can be clear signals that a plant is thirsty. If a plant lacks sufficient water, its ability to absorb nutrients weakens, leading to stunted development and discoloration. Environmental factors like temperature fluctuations and inadequate sunlight exposure can worsen these symptoms, making it harder to distinguish between water stress and other issues.
Observing how sunlight exposure interacts with watering habits helps refine the diagnosis. For example, plants receiving intense sunlight could require more frequent watering, while those in shaded areas could show yellowing due to overwatering or poor drainage.
Paying close attention to these signs alongside soil moisture levels allows for better care decisions, preventing lasting damage and promoting healthier growth patterns in potted plants.
How to Perform the Finger Test
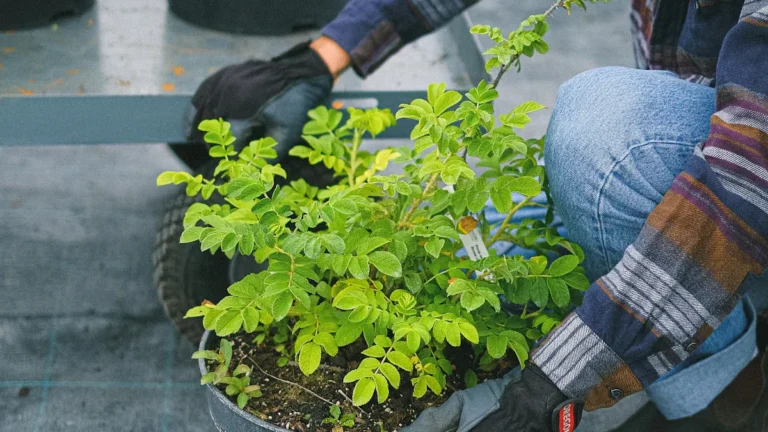
Performing the finger test starts with choosing the right finger, usually the index or middle finger, to get a good feel of the soil’s moisture.
Inserting the finger properly means gently pushing it about an inch or two into the soil without disturbing the roots.
Once inside, the texture and dampness on the fingertip help interpret whether the plant needs watering or whether the soil still holds enough moisture.
Choose the Right Finger
Choosing the right finger for the moisture test plays a key role in getting accurate results. Historically, gardeners have relied on different fingers, influenced via cultural beliefs and traditional methods passed down through generations. For example, some cultures highlight the middle finger for its sensitivity, while others prefer the index finger, which balances control and reach.
The choice depends on finger size, sensitivity, and the type of plant being tested. A finger too thick could miss subtle moisture levels, while one too thin could give misleading impressions. Grasping these historical methods and cultural preferences helps refine the test, making it more reliable. Selecting a finger that feels both comfortable and responsive guarantees a better connection to the soil’s condition, bridging traditional wisdom with practical accuracy. This foundation sets the stage for proper finger insertion techniques.
Insert Finger Properly
Once the right finger is selected, gently pressing it into the soil reveals much more than just surface dryness. The finger length impact becomes clear, as inserting the finger about two inches deep allows one to assess moisture where most roots thrive. Going too shallow only checks the dry top, while too deep risks damaging roots.
It’s vital to insert the finger slowly and steadily, feeling the soil’s texture and dampness. Nail hygiene concerns also come into play; keeping nails clean prevents transferring bacteria or fungi into the soil, which could harm the plant. Washing hands before and after the test is a simple yet essential habit.
This careful, mindful insertion bridges the gap between guesswork and confident care, setting the stage for accurately interpreting soil texture next.
Interpret Soil Texture
Although inserting a finger into the soil gives a quick glimpse of moisture, interpreting the soil texture reveals much more about the pot’s condition.
Feeling how soil crumbles or sticks between fingers helps gauge its composition—whether sandy, loamy, or clay-heavy.
This texture influences water retention and drainage, critical factors for healthy roots.
Recognizing soil texture impact guides the gardener in selecting texture based amendments, like adding perlite to improve drainage or organic matter to enhance moisture retention.
When soil feels gritty and drains fast, it could need more moisture-holding amendments.
Conversely, sticky, compact soil signals overwatering or poor aeration, requiring amendments that loosen texture.
A skilled finger test goes beyond moisture; it helps understand soil health, enabling adjustments that keep plants thriving in pots.
Understanding Soil Texture and Moisture
A good grasp of soil texture is key to comprehension of how moisture behaves in a pot. Soil texture influences soil drainage patterns, determining how quickly water moves through the mix. Coarse soils like sand drain rapidly but hold fewer nutrients, while finer soils such as clay retain water longer yet could produce root suffocation when excessively wet.
Understanding these nutrient retention factors helps in anticipating how often watering is needed. For example, loam balances drainage and retention, keeping roots happy without drowning them. Recognizing these dynamics allows users to better assess moisture levels by feel or meter, as texture affects how moisture clings to particles. This insight bridges naturally to selecting the right moisture meter, ensuring measurements match the soil’s unique characteristics for optimal plant care.
Choosing the Right Moisture Meter
Selecting the right moisture meter can make a big difference in caring for your potted plants. Many soil moisture myths confuse gardeners, such as believing all meters work the same or that expensive models always offer better accuracy. Choosing a meter involves considering sensor type, ease of use, and durability. Analog meters provide quick readings, while digital ones often deliver more precise data. It’s key to look for a meter with probes suited to your soil type to avoid misleading results. Regular meter maintenance tips include cleaning probes after use and storing the device properly to prevent damage. A well-maintained meter guarantees consistent performance, helping gardeners avoid overwatering or underwatering. Grasping these factors aids in excelling at soil moisture measurement and supports healthier plant growth.
How to Use a Moisture Meter Correctly
Using a moisture meter correctly starts with picking the right device for your plants and soil type. Next, it’s crucial to insert the probe gently but deep enough to get an accurate reading without harming roots. Finally, knowing what the numbers mean helps you decide whether to water and keep your plants happy.
Choosing the Right Meter
As it comes to checking the moisture level in your pot, the right meter makes all the difference. Selecting between digital meter options and analog meter benefits depends on precision needs and ease of use. Digital meters offer quick, accurate readings with clear displays, perfect for detailed monitoring. Analog meters, while simpler, provide reliable feedback through needle movement, helping users develop intuition about moisture levels. While picking, consider:
- Soil type compatibility to guarantee precise sensing.
- Battery life and durability for steady performance.
- Calibration ease to uphold measurement accuracy over time.
Balancing these factors helps gardeners pick a tool that fits their routine and plant care goals. Grasping these choices sets a strong foundation before learning proper probe insertion techniques.
Proper Probe Insertion
Ensuring the moisture meter’s probe is inserted correctly plays a big role in getting accurate readings. For indoor plants, gently push the probe into the potting mix, avoiding roots and large air pockets.
Outdoor probe techniques often require deeper insertion due to soil variability, so steady, even pressure is essential. Recognizing the difference between analog and digital probe tools matters too.
Analog probes need careful, slow insertion to prevent bending and signal interference, while digital probes tolerate firmer handling but still demand straight placement for precise data.
Always insert the probe vertically, not at an angle, to sample moisture evenly. Taking these steps helps avoid false dry or wet signals.
Perfecting proper probe insertion improves confidence in moisture readings and guides better plant care decisions.
Interpreting Moisture Readings
Moisture meters often reveal more than just numbers; they tell a story about how thirsty a plant truly is. Comprehending these readings assists in avoiding soil aeration effects that harm roots or cause nutrient uptake issues. While interpreting moisture levels, consider:
- Low readings could indicate dry soil, risking root stress and poor nutrient absorption.
- High readings suggest overly wet soil, which can suffocate roots and reduce oxygen, leading to poor aeration.
- Mid-range readings usually signal ideal moisture, balancing water availability and air pockets for healthy roots.
Also, check multiple spots since moisture varies within the pot. Regular monitoring helps adjust watering before problems start. These observations guarantee plants stay hydrated without drowning, supporting strong growth and lively health.
Comparing Finger Test and Moisture Meter Accuracy
One common way gardeners check whether their plants need water is through using the finger test, which involves feeling the soil’s dampness with a fingertip. This method offers immediate, intuitive feedback but relies heavily on the user’s experience, affecting its field test reliability.
In contrast, moisture meters provide more objective readings, yet their accuracy depends on proper calibration. A well-calibrated meter can detect subtle moisture differences that fingers could overlook, especially in deeper soil layers.
However, meters can sometimes give inconsistent results due to soil type or sensor quality.
Accordingly, combining finger test intuition with meter calibration accuracy creates a balanced approach. Gardeners gain both tactile insight and precise data, enhancing watering decisions without depending solely on one method’s limitations. This combination improves general moisture assessment confidence.
Common Mistakes When Checking Soil Moisture
While combining finger tests with moisture meters gives gardeners helpful guidance, mistakes can still happen while checking soil moisture. Initially, relying solely on urban gardening myths often leads to misjudging moisture needs, causing overwatering risks that harm roots. Second, testing only the surface soil ignores deeper moisture levels, giving a false sense of dryness or wetness.
Third, inserting moisture meters too shallowly or in inconsistent spots yields inaccurate readings, confusing care decisions. Additionally, gardeners sometimes check moisture immediately after watering, which can misrepresent the plant’s dry-down cycle. Finally, not calibrating or maintaining moisture meters can lead to faulty data. Avoiding these errors helps gardeners read soil moisture more accurately, promoting healthier plants and preventing common watering pitfalls.
Adjusting Watering Frequency Based on Moisture Levels
Frequently, gardeners find themselves adjusting how often they water based on what the soil tells them. Moisture levels fluctuate with seasonal variations in watering needs; warmer months demand more frequent hydration, while cooler periods call for restraint.
The pot material affects moisture retention substantially—clay pots breathe more, drying out faster, whereas plastic pots hold moisture longer. Through regularly checking soil dampness with fingers or meters, gardeners can fine-tune watering schedules, preventing overwatering or drought stress.
This attentiveness promotes healthier roots and stronger plants, as watering aligns precisely with actual conditions rather than fixed routines. Detecting these subtle signals helps avoid common pitfalls and encourages sustainable care, making watering an intuitive, responsive practice that adapts naturally to the plant’s environment and growth cycle.
Special Considerations for Different Plant Types
Acknowledging the unique watering needs of different plants leads to healthier growth and happier gardeners. Recognizing soil aeration effects is essential since some plants thrive in well-aerated soil, while others prefer denser, moisture-retentive mixes. Grasping nutrient retention strategies also varies according to plant type, affecting how often moisture should be checked. Consider these points:
- Succulents require less frequent watering and benefit from fast-draining soil that limits moisture to prevent root rot.
- Tropical plants often need consistently moist soil with good aeration to support their high nutrient uptake.
- Herbs typically prefer moderate moisture and soil that balances aeration and nutrient retention for optimal flavor development.
Tailoring moisture checks and watering schedules to these differences makes certain plants receive the right environment for strong health and growth.
Tips for Maintaining Consistent Soil Moisture
Preserving steady soil dampness frequently demands a careful equilibrium between overwatering and under-watering. Adapting to periodic changes in irrigation is essential, as vegetation requires less hydration in colder seasons and increased amounts during warm, arid times. Adding natural ground cover for water conservation aids through minimizing vapor loss and maintaining consistent ground warmth. Periodically inspecting container dampness amounts guarantees prompt hydration, whereas employing permeable earth composition avoids sogginess.
| Tip | Benefit |
|---|---|
| Periodic irrigation adaptations | Aligns with vegetation requirements accurately |
| Natural ground cover | Retains earth dampness extended periods |
| Permeable earth composition | Prevents root decay |
Such approaches collaborate to establish a dependable hydration setting, fostering sound root structures and strong vegetation development.