
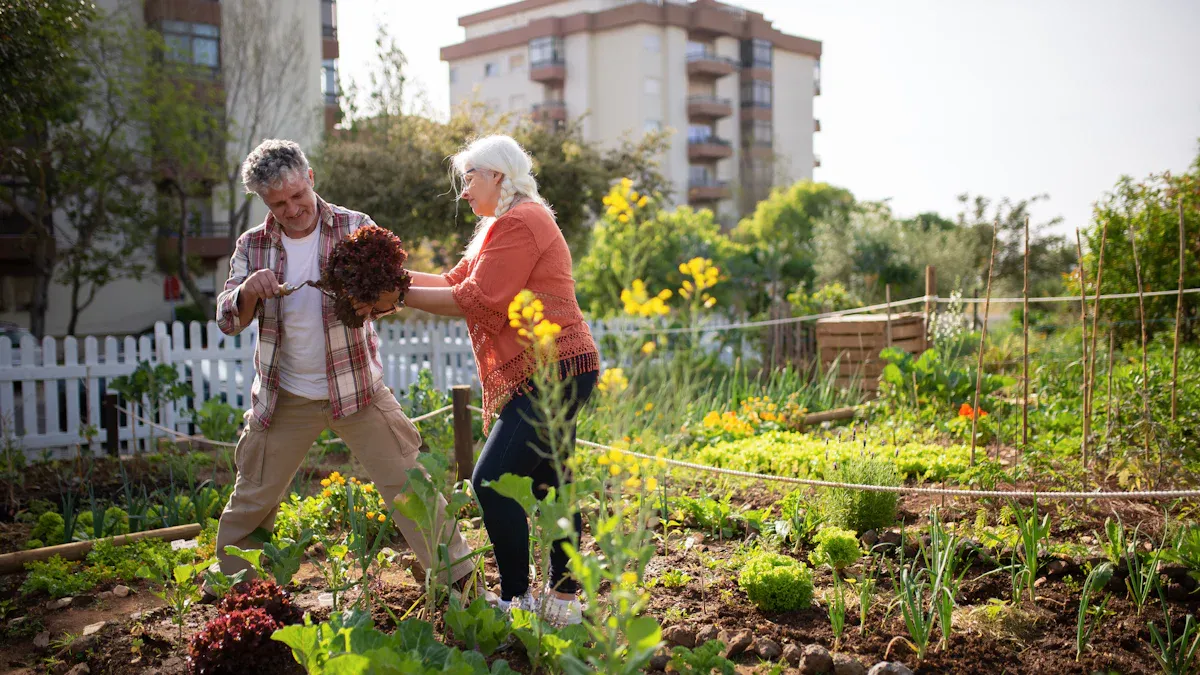
You dream of a thriving garden, but starting can seem overwhelming. Many beginners feel this way. Yet, gardening is a rewarding journey accessible to everyone. Approximately 71.5 million U.S. households engage in gardening annually. This comprehensive guide is designed specifically for the beginning gardener, providing step-by-step instructions and reassurance that anyone can succeed. Whether you are just starting out or looking to improve your skills, this guide transforms you from a novice to a confident gardener. It covers essential planning and expert care. You will learn successful plant growing. You will also discover the joy and benefits of your own garden, like increased life satisfaction and reduced stress. Your new garden will bring immense satisfaction. This gardening for beginners resource helps you create a beautiful garden.
Key Takeaways
- Plan your garden carefully. Check sunlight, soil, and climate. Choose the right garden type and easy-to-grow plants.
- Prepare your soil well. Add compost to improve it. Test your soil to know its needs.
- Plant seeds or seedlings correctly. Give them enough space. Harden off seedlings before planting them outside.
- Water your plants wisely. Avoid giving them too much or too little water. Use mulch to keep soil moist and control weeds.
- Care for your garden regularly. Use organic fertilizers. Manage pests and diseases naturally. Prune and harvest your plants at the right time.
Zero to Pro Planning
Successful gardening for beginners starts with careful planning. You need a solid plan before you dig. This section guides you through the foundational steps. You will learn to assess your space, choose your garden type, and select the right vegetables and tools. If you are starting a new bed, it’s important to prepare and amend the soil to create the best conditions for healthy plant growth. This detailed guide helps you achieve garden success.
Understanding Your Space
First, you must understand your garden space. This involves checking sunlight, soil, and climate.
- Sunlight Exposure: Most vegetables need plenty of sun. You should observe your chosen area for a full day. Note how many hours of direct sunlight it receives.
- Full sun means six hours or more of direct sunlight daily. This can be continuous or split.
- Partial sun requires four to six hours of direct sunlight each day. This usually happens in the morning or afternoon.
- Partial shade has two to four hours of direct sunlight daily. This often occurs during cooler morning hours or late afternoon.
- Shade receives less than two hours of direct sunlight daily. Filtered light often fills the rest of the day.
Many vegetables thrive with 6 to 8 hours of sunlight. Some can still produce with less. For example, herbs like mint, chives, and parsley can survive with 2 to 4 hours of sunlight. They may not thrive as much as with more light. Leafy greens such as lettuce, arugula, and spinach grow well with 4 to 6 hours of sunlight. They produce many leaves. They may even prefer some afternoon shade on warmer days.
Here is a table showing sunlight needs for common vegetables:
| Vegetable | Minimum Direct Sunlight | Preferred Direct Sunlight |
|---|---|---|
| Artichoke | 6 hours/day | 6 – 10 hours/day |
| Arugula | 4 – 6 hours/day | 6 – 8 hours/day |
| Asparagus (Seed/Crown) | 6 hours/day | 8 – 10 hours/day |
| Beet | 4 – 6 hours/day | 6 – 8 hours/day |
| Bean | 6 hours/day | 8 – 10 hours/day |
| Bok Choy | 4 – 6 hours/day | 6 – 8 hours/day |
| Broccoli | 6 hours/day | 8 – 10 hours/day |
| Brussels Sprout | 6 hours/day | 8 – 10 hours/day |
| Cabbage | 6 hours/day | 8 – 10 hours/day |
| Carrot | 6 hours/day | 8 – 10 hours/day |
| Cauliflower | 6 hours/day | 8 – 10 hours/day |
| Celery | 6 hours/day | 8 – 10 hours/day |
| Chard, Swiss | 4 – 6 hours/day | 6 – 8 hours/day |
| Muskmelon (Cantaloupe) | 6 hours/day | 8 – 10 hours/day |
| Onion | 6 hours/day | 8 – 10 hours/day |
| Parsley | 4 – 6 hours/day | 6 – 8 hours/day |
| Pea | 6 hours/day | 8 – 10 hours/day |
| Pepper | 6 hours/day | 8 – 10 hours/day |
| Potato | 6 hours/day | 8 – 10 hours/day |
| Pumpkin | 6 hours/day | 8 – 10 hours/day |
| Radish | 6 hours/day | 8 – 10 hours/day |
| Spinach | 4-6 hours/day | 6-8 hours/day |
| Squash | 6 hours/day | 8 – 10 hours/day |
| Sweet Potato | 6 hours/day | 8 – 10 hours/day |
| Tomato | 6 hours/day | 8 – 10 hours/day |
| Turnip | 4-6 hours/day | 6 – 8 hours/day |
| Watermelon | 6 hours/day | 8 – 10 hours/day |
Soil Type: Good soil is vital for growing healthy vegetables. You should check your soil’s pH and drainage.
pH: This measures how acidic or alkaline your soil is. Most garden plants thrive in slightly acidic to neutral soil. This is typically within the 6.0 to 7.0 range. A pH of approximately 6.5 works well for the majority of garden plants.
Drainage: Good drainage prevents roots from rotting. You can test drainage by digging a small hole and filling it with water. If the water drains quickly, your soil has good drainage. If it sits for a long time, you have poor drainage.
Local Climate Zone: Know your USDA Hardiness Zone. This tells you which plants can survive winter in your area. This information helps your garden plan.
Choosing Your Garden Type
You have several options for your garden design. Your choice depends on your space, budget, and preferences.
- Container Gardening: This is an excellent choice for a small space or limited budgets. You can use pots, buckets, or grow bags. Hanging baskets and window boxes are also great options for beginners with limited room.
- Advantages:
- Easy and Inexpensive Start: You can use containers you already own. You can also buy inexpensive options.
- Flexibility and Portability: You can move containers to optimize sunlight. You can protect plants from bad weather. You can even relocate them if you move.
- Reduced Weeds: Container gardening significantly reduces weeds. This makes gardening more enjoyable.
- Fewer Pests and Diseases: Starting with fresh, pathogen-free soil in containers reduces soilborne diseases. It also makes pest management easier.
- Immediate Access to Good Soil: You can instantly give plants nutrient-rich, well-draining soil. You fill containers with a suitable mix.
- Accessibility: You do not need a large yard. You can garden on patios or windowsills.
- Less Intimidating: Starting small builds confidence for beginners.
- Disadvantages:
- Limited Growth Space: Containers restrict root growth. This can limit plant size. You can manage this by choosing proper container sizes. Fill them completely with soil.
- Increased Watering Responsibility: Plants in containers rely on you for water. Their roots cannot find moisture. This requires daily monitoring. Tools like soil moisture meters can help.
- Nutrient Leaching: Drainage holes cause nutrients to wash out with watering. This means you need regular fertilization. Add compost monthly.
- Temperature Fluctuations: Soil in containers heats and cools faster than ground soil. This can stress plants. Choose tolerant plants. Group containers for insulation. Use larger containers. Place them strategically.
- Raised Beds: These are wooden or metal frames filled with soil. They offer good drainage and control over soil quality. They are great for vegetable gardening. They also reduce bending.
- In-Ground Plots: If you have a yard, you can plant directly in the ground. This requires more soil preparation. It offers more space for larger vegetables.
- Vertical Gardens: These use vertical structures to grow plants. They are perfect for very small spaces. They add a unique garden design.
What to Grow: Vegetable Gardening & More
Choosing what to grow is exciting. Focus on easy gardening options for your first garden. Consider your climate and skill level.
- Easy-to-Grow Vegetables:
- Radishes: They grow quickly. They resist insects. They are hard to kill. This makes them ideal for beginners.
- Carrots: They are fun to grow. They generally do not attract insects.
- Lettuce: It grows fast and is resilient. You can harvest leaves multiple times. They continue to grow back.
- Sugar and Snap Peas: They produce many pods. You can eat them fresh. Children love them. They thrive in cooler weather and well-drained soil.
- Beets: Both the deep green leaves and the roots are edible. You can sauté the leaves. You harvest the roots later.
Some fruits, such as strawberries or blueberries, can also be grown by beginners for a rewarding harvest.
- Herbs: Many herbs are easy to grow in pots or beds. Examples include basil, mint, rosemary, and thyme.
- Flowers: Choose flowers that attract pollinators. Marigolds and zinnias are good choices. They add beauty to your vegetable garden design. Annuals are a good choice for beginners because they provide quick color and need to be replanted each year.
- Plants to Avoid for First-Time Gardeners: Some vegetables are more challenging. You should avoid them when learning how to start a vegetable garden.
- Sweet Corn: It needs large amounts of fertilizer and water. It is prone to pests like corn earworms. It degrades quickly after harvest.
- Pumpkin: Large carving pumpkins are difficult. They suffer from diseases like downy mildew. They also need a long growing season, much water, and fertilizer.
- Tomatoes (slicing): These often frustrate beginners. Summer heat and humidity cause diseases and insect pests. Heat also affects flower and fruit production. Blossom end rot is common.
Essential Tools for Gardening Beginners
You need a few basic tools for successful gardening. You do not need to buy everything at once. Start with these essentials:
- Garden Gloves: Protect your hands from dirt, thorns, and rough surfaces.The main reason to wear gloves when working outdoors is to protect your hands! Many times there can be rough edges when picking things up or even thorns when pulling plants. Knowing your hand is protected with a good glove can give you peace of mind. Not to mention it’s more comfortable! …it’s nice to know my hand is clean because I’ve been wearing a glove.
- Nitrile-coated gloves protect against dirt and moisture. They are water-resistant. They offer excellent grip and flexibility.
- Leather gloves protect against thorns and sharp objects. They are durable and comfortable.
- Coated grip gloves provide a strong grip. They offer excellent dexterity. They are suitable for handling plants and tools.
- Pruning Shears: These cut small branches and stems.
- Bypass pruners make clean cuts on live plants and green wood.
- Anvil pruners cut dry branches and dead wood. They crush the wood slightly.
- Ratchet pruners are like anvil pruners. They offer leverage to reduce wrist strain.
- Watering Can or Hose: Essential for delivering water to your plants. A watering can is good for containers. A hose is better for larger areas.
- Hand Trowel: A small shovel for digging holes for planting. It also helps with weeding.
- Garden Kneeler: Protects your knees when working close to the ground.
- Leaf Rake: Gathers leaves and debris.
- Basic Shovel: For digging larger holes, turning soil, or moving compost.
This careful planning sets you up for a rewarding growing season. You are now ready for the next steps in your gardening journey.
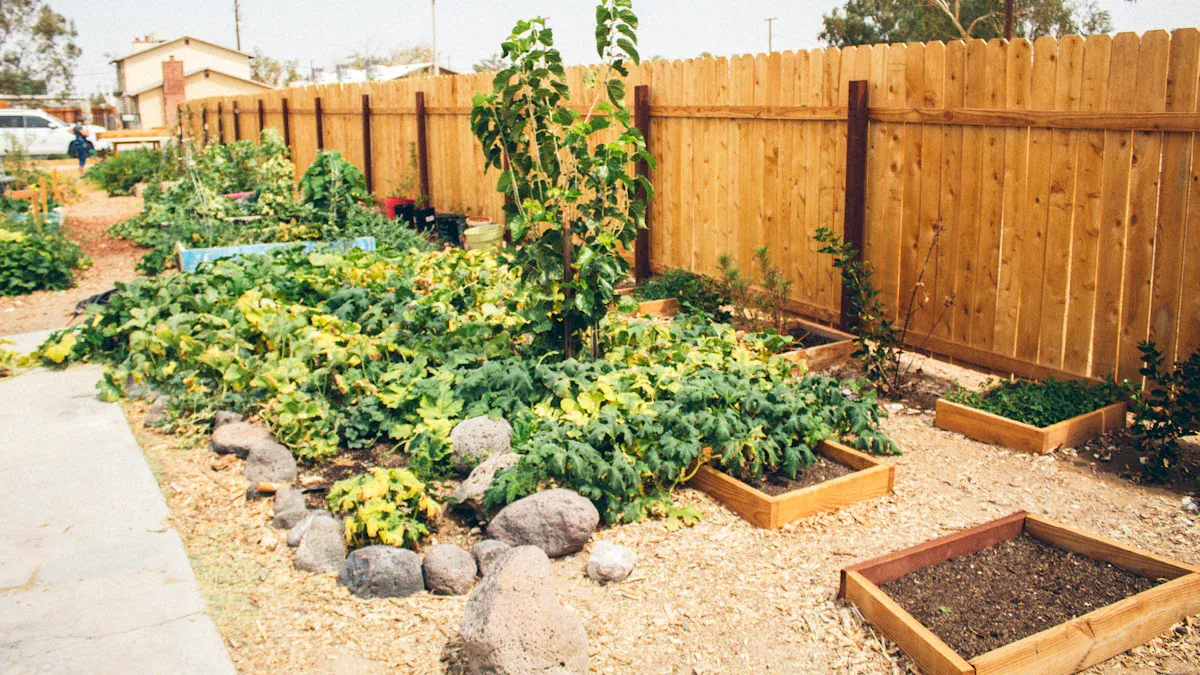
Raised Bed Gardening: An Easy Start for Beginners
Raised bed gardening is one of the best ways for a beginner gardener to dive into vegetable gardening with confidence. Raised beds offer excellent control over your garden soil, making it easier to create the rich, well-draining environment that vegetables, herbs, and flowering plants love. Whether you have a large yard or a small outdoor space, raised beds can be built to fit your needs using wood, stone, or composite materials.
To get started, choose a sunny spot—most vegetables and herbs thrive in full sun, but some can do well in partial sun. Fill your raised bed with a blend of quality garden soil, compost, and organic matter to ensure your plants have all the nutrients they need for a thriving garden. Raised beds also make it easier to manage weeds and pests, and they warm up faster in early spring, giving your plants a head start on the growing season.
You can plant a variety of vegetables, herbs, and even flowering plants in your raised bed. The improved drainage and soil structure help roots grow strong and healthy, leading to a more bountiful harvest. With just a little care and regular watering, your raised bed will become a beautiful and productive part of your garden, making gardening more enjoyable and less labor intensive for beginners.
The Full Checklist: A Beginner’s Guide
This section outlines the practical steps to get your garden started. You will learn how to prepare your soil, plant seeds or seedlings, water wisely, and use mulch for success. This section also includes practical gardening tips to help beginners succeed. This complete guide helps you establish a thriving garden.
Soil Preparation
Good soil is the foundation of a successful garden. You must improve your soil’s health. This involves amending it with compost, testing its composition, and ensuring proper aeration.
You can rapidly modify your planting bed by adding compost. Compost increases the moisture-holding capacity in your soil. It also boosts nutrients and the nutrient-holding capacity. This changes the soil texture and porosity. You will see a rapid increase in soil organic matter. Compost also suppresses soil-borne pathogens. By adding compost, you help create rich soil, which is essential for healthy plant growth.
Compost improves soil structure. It enhances drainage in clay soils. It boosts water retention in sandy soils. This happens by forming aggregates. These aggregates create spaces for air and water. This facilitates deeper root growth. Compost adds nutrients.
Mature compost contains small amounts of essential nutrients. These include phosphorus (0.6-0.9%), potassium (0.2-0.5%), and nitrogen (1-2%). It also has secondary nutrients like calcium, magnesium, and sulfur. Compost balances pH levels. It can adjust soil pH in either direction. It makes acidic soil more alkaline or alkaline soil more acidic. This is achieved by increasing the soil’s cation exchange capacity (CEC). CEC measures nutrient retention and availability.
Here are the benefits of compost:
- Nutrient Enrichment: Compost is rich in organic matter and essential nutrients. These include nitrogen, phosphorus, and potassium. They release slowly. This provides sustained nutrition for plants. This is especially true in poor soils.
- Soil Structure Improvement: Compost enhances soil’s ability to hold moisture and nutrients. It improves aeration and drainage. It allows plant roots to penetrate more easily. This leads to vigorous growing.
- Microbial Activity Enhancement: Compost teems with beneficial microorganisms. These include bacteria, fungi, and earthworms. Compost breaks down organic matter. It releases nutrients. It suppresses pathogens. It promotes a healthy soil ecosystem.
- pH Regulation: Compost acts as a buffer. It helps regulate imbalanced soil pH levels. It brings them closer to the optimal range for most crops.
- Reduction of Soil Erosion: Compost binds soil particles. It reduces erosion caused by wind and water. This is particularly beneficial in areas with poor soil structure.
- Sustainability: Composting recycles organic waste. It reduces landfill use. It promotes sustainable gardening. It lessens the need for chemical fertilizers and pesticides.
You should test your soil. This helps you understand its pH and nutrient levels. Inexpensive, commercially available soil test kits are generally unreliable. They may accurately measure pH. However, they do not indicate the amount of lime needed.
Factors like soil texture, organic matter, crop type, target pH, and acidity levels are crucial. They determine lime requirements. You can get consistently reliable results for soil pH and nutrient levels. Submit samples to a soil-testing laboratory. Many state agricultural departments offer these services. They may be free or have a small fee.
Soil tests typically provide information on Phosphorus, Potassium, Magnesium, and Calcium levels. Nitrogen is essential and needed in large quantities. However, it is often not included in basic fertility tests. This is due to its high mobility and constantly changing values in the soil.
You can use home testing kits. These DIY kits are readily available at garden centers. They are inexpensive. They provide a good indication of soil pH. Some home tests can also detect free calcium carbonate. You observe fizzing when vinegar is added. For more detailed analysis, send soil samples to a laboratory. These professional tests can detect free calcium carbonate. DIY kits might miss this. They provide comprehensive reports.
Planting Seeds or Seedlings
Proper planting depth and spacing are crucial for optimal growth. They ensure strength, disease resistance, and ideal size for your vegetables. Providing enough light, water, nutrients, and airflow allows plants to thrive. There is no such thing as being spaced too far apart. However, some crops like corn require minimum density for pollination.
Use minimum spacing guidelines as a starting point. If space allows, increase the distance beyond the minimum. This can result in larger, more robust, and disease-resistant plants. It leads to more bountiful crops. These guidelines are often based on the needs of an average gardener with limited space. Adjusting for more room can be beneficial.
- Planting Depth:
- General Rule: Plant seeds 2 to 3 times as deep as they are wide. For example, a 1/8 inch thick seed should be planted 1/4 to 3/8 inch deep. Beginners should always check the seed packet for specific instructions on planting depth and spacing.
- Specific Depths:
- Lettuce, carrots, onion seeds: 1/8 to 1/4 inch (barely covered)
- Beans, peas, cucumbers: 1/2 to 1 inch
- Corn, squash, pumpkins: 1.5 to 2 inches
- Planting Spacing:
- Importance: Proper spacing prevents overcrowding. Overcrowding leads to competition for water, nutrients, and sunlight. It also increases disease susceptibility. Seed packets provide valuable information about germination and thinning, so refer to them for best results.
- Specific Spacing Examples:
- Carrots and radishes: 1–2 inches apart
- Lettuce: 4–6 inches apart
- Beans: 3–6 inches apart in rows 18–24 inches apart
- Tomatoes (direct sow): 2–3 feet apart
- Cucumbers and squash: 2–3 feet apart
Consider succession planting to ensure a continuous harvest throughout the growing season.
Vining plants like beans or cucumbers need support and extra space to climb, so plan accordingly.
Here is a table for spacing your vegetables:
| Plant Variety | Spacing Between Plants | Spacing Between Rows |
|---|---|---|
| Amaranth | 7”-10” | 10”-12” |
| Artichoke | 18” | 24”-36” |
| Asparagus | 12”-18” | 36”-48” |
| Bean-Bush | 2”-4” | 18”-24” |
| Bean-Pole | 4”-6” | 24”-36” |
| Beets | 3”-4” | 12”-18” |
| Broccoli | 18″ – 24″ | 24”-36″ |
| Lettuce-heading | 12” | 12” |
| Lettuce-loose leaf | 3” | 3” |
| Okra | 12”-14” | 24”-36” |
| Onion | 4”-6” | 4”-6” |
| Parsnips | 8”-10” | 18”-24” |
| Peas | 4”-6” | 18”-24” |
| Peppers | 14”-18” | 18”-24” |
| Pigeon Peas | 4”-8” | 36”-40” |
| Potatoes | 8”-12” | 30”-36” |
| Pumpkin | 34”-72” | 60”-120” |
| Radicchio | 8”-10” | 12” |
| Radish | 1”-4” | 2”-4” |
| Rhubarb | 36”-48” | 36”-48” |
| Rutabaga | 6”-8” | 12”-18” |
| Shallots | 6”-8” | 6”-8” |
| Spinach | 2”-4” | 12”-18” |
| Squash-summer | 18”-24” | 36”-48” |
| Squash-winter | 24”-36” | 48”-60” |
| Sweet Potato | 12”-18” | 36”-48” |
| Swiss Chard | 6”-12” | 12”-18” |
| Tomatillo | 23”-36” | 36”-48” |
| Tomatoes | 24”-36” | 48”-60” |
| Turnips | 2”-4” | 12”-18” |
You must harden off seedlings before transplanting them outdoors. This process helps them adjust to outdoor conditions. If a plant’s roots have formed a big ball, gently loosen the outer roots before planting to encourage healthy growth.
- Move plants outdoors to a shady, protected spot. Do this when temperatures are at least 45-50°F.
- Initially, place them in this sheltered location for two to three hours.
- Gradually increase the amount of sunlight the plants receive. Do this over a two-week period. Allow them to spend 24 hours outside during the last day or two.
- Reduce the amount of water plants receive. However, ensure they do not wilt.
- Avoid placing seedlings outdoors on windy days.
- Utilize cold frames or other protected spots like a porch for hardening.
- Monitor the weather forecast. Bring plants inside if temperatures are expected to fall below 45°F.
Begin the hardening-off process when outdoor temperatures reach at least 45 degrees Fahrenheit. Cooler temperatures can weaken warm-season crops. Place seedlings outside for one to two hours in mid- to late-afternoon.
Ensure they are in a spot protected from direct wind and sunlight. Gradually extend the outdoor time for your plants each day. Increase it by an hour more than the previous day. Progressively expose them to more sunlight and wind. Continue until they can remain outside for an entire night. Maintain moist soil throughout the hardening-off period.
Start by allowing seedlings to acclimate outside for 2-3 hours per day. Place them in a covered, protected spot away from direct sun. This introduces them to temperature changes and breeze. Continue this ‘shade vacation’ for two days.
On day three, introduce them to morning sun for one hour. Morning sun is gentler than afternoon sun. Then, move them back to shade until early evening. Bring them inside after that. Increase the time spent in the sun each day. After day seven, allow them to spend the night outside under a covered porch. Continue to lengthen their time in the sun.
Do this until the two-week process is complete. This indicates they are ready for transplanting. This careful preparation ensures your vegetables thrive. It also helps you know when to plant vegetables.
Watering Wisdom
Understanding plant water needs is essential for successful gardening. You need to know the best watering practices. You must also avoid over-watering or under-watering.
Here are signs of overwatering:
- Yellowing around the midrib of bottom leaves, spreading to the entire leaf.
- Dark green or purple veins (chlorosis).
- Dark brown tips or spots on leaves due to damaged roots.
- Drooping leaves.
- Leaf drop of new and old growth.
- Mushy stems and roots.
- Fungus or mold on the soil.
- Presence of fungus gnats.
- Foul-smelling soil, indicating root rot.
Here are signs of underwatering:
- Slight droop to leaves, then branches wilting.
- Leaf edges curling inward (like a potato chip).
- Brown edges with a yellow ring around them.
- Intensified browning and curling until the whole leaf is dried out, and eventually the whole plant.
You might see yellow or brown limp, droopy leaves. This differs from dry, crispy leaves from underwatering. Wilting leaves with wet soil often indicate root rot. Dropping old and new leaves alike can occur. These leaves can be green, brown, or yellow. The base of the plant stem feels mushy or unstable. The soil may emit a rotten odor. Leaves develop brown spots or edges. These are often encircled by a yellow halo. This suggests a bacterial infection. Fungus or mold grows directly on top of the soil. Fungus gnats may be present.
The tip of a plant’s leaf is brown. It feels soft and limp due to overwatering. This contrasts with dry and crispy leaves from underwatering.
Leaves turn brown and wilt. The key difference from underwatering is that overwatered leaves are soft and limp. Underwatered leaves are dry and crispy. Water pressure builds in plant cells. This causes them to burst. They form blisters. These then develop into tan, brown, or white wart-like growths. They have indentations on the top sides of the leaves. Stunted, slow growth accompanies yellowing leaves. Accelerated leaf drop also occurs. This includes both old and new leaves.
You should moisten the top 6 to 9 inches of soil. Do this over the entire root zone. Avoid light watering. Light watering encourages shallow root systems.
This makes plants vulnerable to heat and drought. Check soil dryness by digging 6 to 9 inches deep under the plant canopy. Water if the soil is dry at this depth. Sandy soils require more frequent, smaller applications of water. This differs from loam or clay soils.
New plantings may require more frequent watering during the first few weeks to help them establish strong roots.
Aim for soil saturation to approximately 8 inches deep. In spring and autumn, water deeply every two weeks. In summer, water up to twice a week. In winter, reduce watering to once a month. Dig a trowel 4 inches deep. If the soil is only slightly moist, it is time to water deeply. Clay soils retain moisture longer than sandy soils. This influences watering frequency.
To determine if watering is needed, periodically dig several inches into the root zone of your plants. If the soil is still moist, additional watering is not beneficial. This helps you know when to plant vegetables and how to care for them.
Mulching for Success
Mulching is a simple yet powerful technique for your garden. It offers many advantages. You should understand how to apply it correctly.
- Moisture Retention: Mulch acts like a sponge. It reduces water evaporation. It keeps soil moist. This is especially beneficial in hot, dry conditions. It helps conserve water.
- Weed Suppression: A thick layer of mulch blocks light from reaching weed seeds. This leads to fewer weeds. It means less time spent on gardening maintenance.
- Soil Temperature Regulation: Mulch insulates the soil. It keeps plant roots cooler in summer. It keeps them warmer in winter. This can be crucial for plant survival.
- Soil Enrichment: Organic mulches, such as wood chips or compost, decompose over time. They add essential nutrients back into the soil. They maintain its richness and fertility. Organic mulches typically break down and enrich the soil within a few months.
- Aesthetic Appeal: Beyond its practical advantages, mulch enhances the visual appeal of a garden. It provides a neat and cohesive appearance.
You can use wood chips and bark mulch. Bark chips are a longer lasting mulch option, especially beneficial for perennials, as they provide durable weed and moisture control. River rock can also be used as a durable mulch for weed suppression and moisture retention, and offers long-lasting aesthetic appeal. Wood chips are primarily carbon. They contain some nitrogen if leaves are included. These are called arborist wood chips. This helps balance the carbon-nitrogen ratio. It provides nutrients as they decompose. Mulching is especially beneficial for raised beds. It helps maintain consistent moisture and temperature for your vegetable plants. This is a key step for beginners in gardening for beginners.
Pro Care Guide: Nurturing Your Garden
This section provides ongoing care instructions to ensure your garden thrives. As your garden begins, it’s important to establish a routine for essential garden chores like watering, weeding, and mulching.
Fertilizing Fundamentals
You need a basic guide to fertilizers. Fertilizers are organic or synthetic.
| Feature | Organic Fertilizers | Synthetic Fertilizers |
|---|---|---|
| Nutrient Concentration | Lower | Higher |
| Nutrient Release Rate | Optimal for plant uptake | Rapid, potentially excessive |
| Plant Safety | Low risk of root burn | High risk of root/leaf burn |
| Soil Effects | Improves soil health | Can harm soil microbiology |
You use organic fertilizers in organic gardening. They improve soil health. Synthetic fertilizers offer defined nutrient amounts. Understand NPK ratios. NPK ratios on fertilizer labels show the percentage by weight of nitrogen (N), phosphorus (P), and potassium (K). For example, a 5-10-5 NPK fertilizer has 5% nitrogen, 10% phosphorus, and 5% potassium. Nitrogen helps leaf growth. Phosphorus stimulates root growth. Potassium helps vegetables resist diseases. Soil tests help you choose the right fertilizer for your vegetable garden. This approach offers easy care.
Pest and Disease Management
You will encounter common garden pests and diseases. Use simple, organic solutions. For aphids and spider mites, try a homemade spray. Mix 2 quarts water, 1/4 cup each of tea tree and peppermint castile soap, 1 tablespoon hydrogen peroxide, and 1 cup 70% rubbing alcohol. Apply this every 5 to 7 days. Predatory insects like ladybugs also help.
Neem oil is another organic option. It kills eggs and larvae. Identify fungal diseases. Powdery mildew looks like white, powdery spots. Downy mildew shows yellowish spots with fuzzy mold underneath. Anthracnose causes dark, sunken spots on fruit. Early detection and organic methods provide easy care for your vegetables. This is key for successful organic gardening.
Weeding Wisely
Consistent weed control is important for your garden. Manual weed pulling is effective. Pull weeds when the soil is moist. This makes extraction easier. Grasp the weed close to the ground. Pull upwards firmly to remove the entire plant, including roots. Tools like a dandelion digger or hand cultivator help. A sharp hoe cuts young weeds at the soil surface. This technique offers easy care for your vegetables. It supports organic gardening.
Pruning and Harvesting
Basic pruning techniques promote healthy growth. Pruning encourages herbs to become fuller. It removes new shoot tips. This makes the plant grow outward. Fast-growing herbs like basil benefit from frequent pruning. Make clean cuts where leaves attach to the stem. This ensures easy care. Tall plants like tomatoes or sunflowers may need stakes, cages, or other supports to help them grow upright and prevent damage.
You also need tips for harvesting****vegetables. For zucchini, harvest them when 8–10 inches long. Larger zucchini can be bland. Tomatoes show their mature color when ripe. They can continue to ripen off the vine. Do not leave ripe tomatoes on the plant too long. This prevents fruit splitting. To grow tomatoes successfully, provide support with stakes or cages and harvest them at the right time for best results. Harvest your vegetables at their peak for best flavor. This is part of good garden care. This provides easy care for your vegetable plants.
Seasonal Care and Winterizing
Prepare your garden for colder months. This involves seasonal tasks. Plant cover crops like clover to prevent erosion. Dig up tender bulbs in colder zones. Store them in a cool, dry place. Bring garden furniture indoors.
Remove fallen leaves and old plant material. This eliminates pest habitats. Harvest flowers before frost. Compost garden waste. Mulch around plants with organic material. This insulates the soil. Plant spring bulbs before the first hard freeze. These steps provide easy care for your garden through winter. This guide helps you maintain your vegetables. This is essential for organic gardening.
Attracting Pollinators to Your Garden
A successful garden depends on the presence of pollinators like bees, butterflies, and hummingbirds. These helpful creatures are essential for the production of fruit and seeds in many plants. To attract pollinators, fill your outdoor space with a diverse selection of flowering plants such as sunflowers, zinnias, and lavender. These blooms provide the nectar and pollen that pollinators need throughout the growing season.
Choose organic seeds whenever possible and avoid using pesticides, as these can harm pollinators and reduce your garden’s productivity. Creating a pollinator-friendly habitat is easy—add a shallow dish of water or a birdbath, and include native plants that are well-adapted to your local climate. Avoid invasive species that can crowd out beneficial plants.
By making your garden a welcoming place for pollinators, you’ll enjoy a more abundant harvest of vegetables and fruit, as well as a vibrant, beautiful garden filled with life. Attracting pollinators is one of the most rewarding steps you can take for a thriving and successful garden.
Final Thoughts
You can become a successful gardener. This gardening for beginners guide provides the knowledge and encourages consistent effort. You mastered planning your garden, initial setup, and ongoing garden care.
Embrace the learning process. Celebrate small victories in your garden. Enjoy the therapeutic benefits of gardening. Spending time gardening can be especially rewarding and beneficial for beginners, helping you connect with nature and find relaxation. Your growing journey in the garden is continuous. Find satisfaction in growing your own garden. This garden planning will lead to great garden success.
