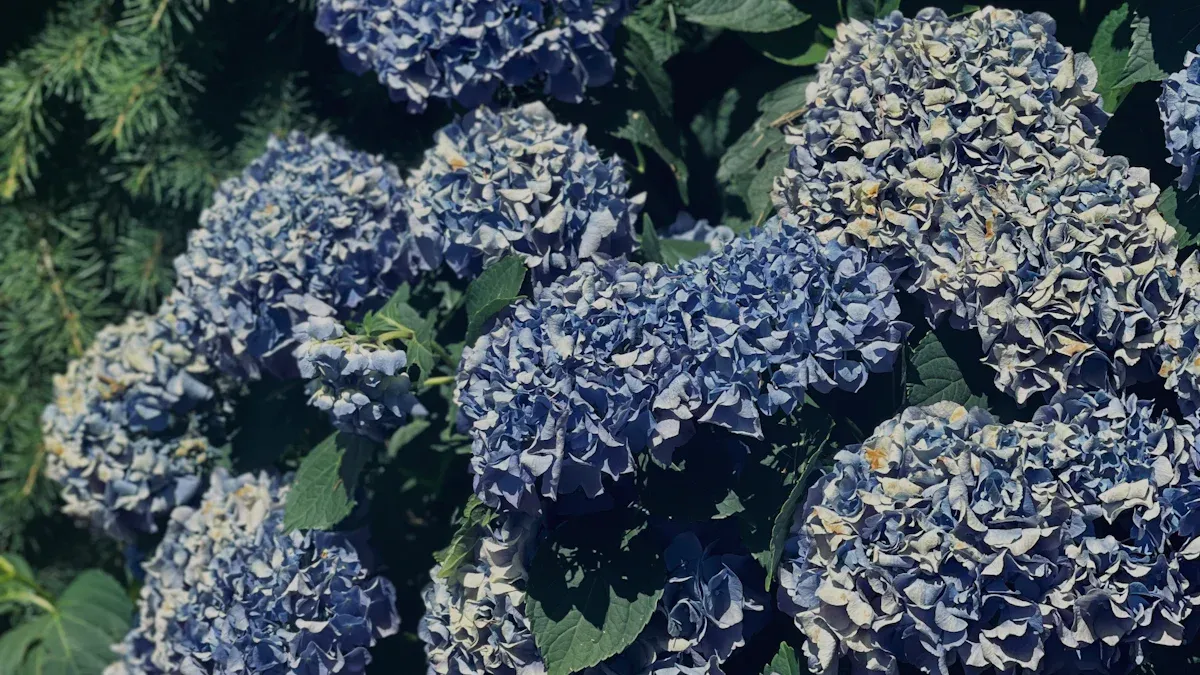
Spring brings excitement for hydrangea lovers, but it also poses challenges. You might face issues like overwatering, which can lead to root rot, or too much sun that scorches leaves. Knowing how to address these concerns is crucial for your hydrangeas’ health. Let’s dive into caring for your Early Spring Hydrangea!
Key Takeaways
Protect hydrangeas from late frosts by wrapping them with burlap and filling the enclosure with leaves for insulation.
Clean around your hydrangeas by removing dried leaves and debris to prevent diseases and promote healthy growth.
Prune hydrangeas at the right time based on their type to ensure vibrant blooms the following season.
Preparing for Early Spring Hydrangea

Frost Protection
As spring approaches, your hydrangeas may start to wake up from their winter slumber. However, late frosts can threaten their delicate buds. To protect your plants, consider these effective methods:
Wrap your hydrangeas with burlap or chicken wire. This creates a barrier against the cold.
Fill the enclosure with leaves to enhance insulation. This extra layer helps keep the warmth in.
Keep the protective wrapping on until the risk of frost has completely passed. This ensures your plants stay safe during unpredictable weather.
Be aware that hydrangea buds can become vulnerable when temperatures drop below 32°F. In fact, they can even be at risk at temperatures as high as 38°F or 40°F under certain conditions. If flowering has already started and temperatures dip below freezing, it can negatively affect your hydrangea’s blooming ability. So, stay vigilant and protect your plants!
Cleaning and Maintenance
Cleaning and maintenance are crucial for your hydrangeas’ health in early spring. By taking the time to tidy up, you can prevent diseases and promote healthy growth. Here are some essential tasks to tackle:
Remove dried leaves around the base of the plant. This helps eliminate excess moisture that can lead to rot.
Clear away all leaves and garden debris. This prevents insects and diseases from taking hold.
Prune deadwood by cutting about one-third of the branches down to the soil line. This encourages new growth and keeps your plants looking tidy.
Apply one to two inches of mulch around the base. This retains moisture and reduces the frequency of watering.
Timing is key when it comes to these tasks. Start your spring care as soon as the ground thaws and the risk of frost diminishes. In colder climates, you might want to choose panicle and smooth hydrangeas that bloom on new wood. These varieties are less likely to suffer from winter bud damage.
By following these steps, you’ll set your Early Spring Hydrangea up for a vibrant and healthy growing season!
Care Practices for Hydrangeas
Pruning Techniques
Pruning your hydrangeas correctly is essential for promoting healthy blooms. The timing and method depend on the type of hydrangea you have. Here’s a quick guide to help you out:
Hydrangea Species (Bloom Type) | Pruning Timing | Pruning Recommendations |
|---|---|---|
Old Wood | Just after flowering | Trim Bigleaf and Mountain Hydrangeas to about 12 inches off the ground. Oakleaf hydrangea can be pruned to the same height or left taller. |
New Wood | Late winter or early spring | Smooth hydrangea can be trimmed to about 12 inches off the ground. Panicle hydrangea can be pruned to the same height or left taller. |
Remontant | Early spring or after first flush of flowers | Pruning height can vary but should remove as little wood as possible to avoid delaying new blooms. |
Improper pruning can lead to fewer blooms. For instance, if you prune bigleaf hydrangeas too early, you might cut off the flower buds that formed last summer. To avoid this, always prune immediately after flowering. This way, you’ll ensure a beautiful display the following season.
Fertilizing Guidelines
Fertilizing your hydrangeas in early spring gives them the nutrients they need to thrive. Here are some tips to keep in mind:
Use a balanced fertilizer with an NPK ratio of 10-10-10 for general growth.
If you want to encourage blooming, consider a fertilizer with a higher phosphorus content, like 10-30-10.
Apply fertilizer every six weeks from early spring until late fall. This helps support growth and flowering.
Here’s a quick reference table for effective fertilizers:
NPK Ratio | Description | Recommended Product |
|---|---|---|
10-10-10 | Balanced nutrients for general growth | Ugarit 27-27-27 + TE |
10-30-10 | Higher phosphorus for blooming | Ugarit 10-10-40 + TE |
10-0-5 | Humic-boosted for nutrient uptake | Ugarit 10-0-5 + 70% Organic Matter |
10-65-10 | Phosphorus-rich for blue blooms | Ugarit 10-65-10 |
40-10-10 | Higher nitrogen for early season | Ugarit 40-10-10 + TE |
0-52-34 | High phosphorus for repeated flowering | Ugarit 0-52-34 |
Watering Needs
Watering is crucial for your hydrangeas, especially in early spring. Here’s what you need to know:
Hydrangeas prefer moist but well-drained soil. Water them thoroughly 2-3 times a week.
Adjust your watering based on soil type. Clay soil retains moisture, so you may need to water less frequently. In contrast, sandy soil drains quickly, requiring more frequent watering.
Watch for signs of overwatering or underwatering. Yellowing leaves or wilting can indicate issues. If you see mold on the soil surface, it might be too wet. Conversely, dry and crispy leaves suggest underwatering.
By following these care practices, you’ll help your Early Spring Hydrangea flourish and enjoy a vibrant blooming season!
Enhancing Growth in Early Spring

Mulching Benefits
Mulching is a fantastic way to boost your hydrangeas’ health in early spring. It offers several benefits that can make a real difference:
Insulates soil temperature: Mulch acts as a protective layer, keeping the soil temperature stable. This is especially important during sudden temperature drops.
Retains moisture: A good layer of mulch prevents rapid moisture evaporation. This is crucial for hydrangeas, which have shallow root systems that need consistent hydration.
Enhances plant health: Organic materials like pine bark, chopped leaves, or straw not only improve soil structure but also provide nutrients as they break down.
For the best results, consider using materials like pine bark or pine needles, which are particularly beneficial for acid-loving hydrangeas. Leaf mold is another excellent option, as it can hold up to 500 times its weight in water, ensuring your plants stay hydrated.
Composting Tips
Composting is another essential practice for enhancing your hydrangeas’ growth. It enriches the soil and provides vital nutrients. Here’s how to get started:
Create rich, moist soil: Compost improves soil health and moisture retention, which hydrangeas thrive on.
Influence soil pH: The pH level of your compost can affect the color of your hydrangea blooms. Acidic soil yields blue flowers, while neutral and alkaline soils produce purple and pink blooms, respectively.
Use a variety of materials: Incorporate kitchen scraps, yard waste, and other organic materials to create a balanced compost mix.
Adding compost in early spring not only enhances growth rates but also improves bloom quality. Your hydrangeas will appreciate the extra nutrients and moisture, leading to a vibrant display throughout the season.
Final Tips for Hydrangea Care
Transplanting Considerations
Transplanting hydrangeas in early spring can be tricky, but with the right approach, you can ensure their successful establishment. Here are some key considerations to keep in mind:
Key Consideration | Description |
|---|---|
Soil Preparation | Prepare the soil by adding compost and conducting a soil test to ensure well-draining conditions. |
Mulching | Apply mulch around the base to retain moisture and suppress weeds. |
Watering | Regular watering is crucial, especially during the growing season after transplanting. |
Fertilization | Fertilize in spring with an acidic fertilizer to support growth. |
Care After Transplanting | Monitor the plant for signs of stress and continue regular care to ensure establishment. |
When you transplant, start digging carefully to avoid damaging roots. Make sure the hole is twice as wide as the root ball but not too deep. After transplanting, water thoroughly and maintain regular watering to help your hydrangeas settle in.
Propagation Methods
If you want to expand your hydrangea collection, propagation is a great option! Here are some effective methods:
Stem Cuttings: This method boasts a success rate of 99%. Take a cutting from a branch about 5-6 inches long. Remove the lower leaves and dip the cut end in rooting hormone (optional). Insert it into damp vermiculite or coarse sand. Keep the soil moist but not soggy, and cover the pot with plastic to maintain humidity. Expect roots to form in 2-3 weeks.
Layering: This method involves bending a low branch to the ground, scraping a bit of bark off the underside, and covering it with soil. Keep it watered until roots form, then you can separate it from the mother plant.
By following these methods, you can enjoy more beautiful blooms in your garden!
Remember, proper care and attention will help prevent common issues. Regularly check for pests, monitor soil moisture, and prune affected areas to keep your hydrangeas thriving. Happy gardening! 🌼
Caring for your hydrangeas in early spring sets the stage for a stunning bloom. Remember these key points:
Different hydrangea varieties need specific pruning techniques.
Checking soil health is vital for optimal growth.
Spring is the best time to fertilize your plants.
By following these practices, you’ll enhance your hydrangeas’ health and flowering potential. Happy gardening! 🌸
Factor | Effect on Flowering Potential |
|---|---|
Moderate Temperature | Enhances floral transition and overall plant health |
Short Day Length | Promotes flower transition under high temperatures |
High Temperatures | Requires longer forcing time for flowering |
FAQ
What type of hydrangea should I plant for my climate?
Choose hydrangeas that thrive in your zone. For colder climates, consider panicle or smooth hydrangeas, as they bloom on new wood.
How often should I water my hydrangeas in spring?
Water your hydrangeas 2-3 times a week, ensuring the soil stays moist but well-drained. Adjust based on your soil type.
When is the best time to prune hydrangeas?
Prune hydrangeas right after flowering for old wood types. For new wood types, prune in late winter or early spring.


