Prayer plant propagation can feel a bit scary at initially, yet it quickly turns into a calm, almost meditative task once someone knows the steps. With just a few clean tools, a healthy mother plant, and the right stem cuttings, a person can grow fresh, lively plants that they are proud of. As each new root appears, confidence grows too, and the process starts to feel surprisingly simple. It all begins with choosing that primary perfect stem.
Gather Your Tools and Choose a Healthy Mother Plant
Before any cutting or potting happens, the process begins with a calm look at what is already growing.
Here, pruning timing and leaf pattern selection already matter. A careful grower initially gathers tools so everything feels simple and relaxed. They set out clean scissors, a small sharp knife, rubbing alcohol, a soft cloth, and a tray or plate for clippings. They also prepare fresh potting mix, a clean pot, and optional rooting hormone.
With tools ready, attention turns to the mother plant.
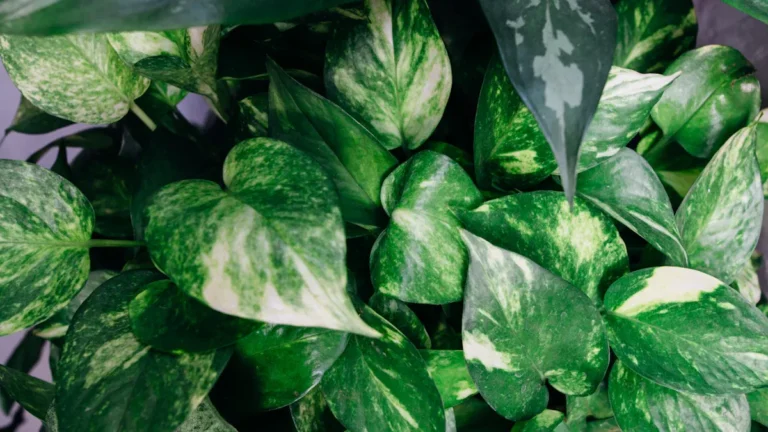
The grower studies total shape, color, and vigor. Steady new growth, strong stems, and vivid patterns signal good health. In case leaves show crisp markings and minimal damage, the plant is ready, and timing the pruning feels confident, not rushed.
Identify the Best Stems and Nodes for Cuttings
Spotting the right stems and nodes feels a bit like choosing the strongest branches on a small, animate sculpture.
With prayer plants, stem selection starts through looking for firm, upright growth that still feels flexible, not brittle or floppy.
The stem should hold leaves confidently, with good color and no spots.
Next, the eye moves to node spacing.
Nodes are the small joints where leaves and roots form.
For reliable cuttings, gardeners look for stems with several closely spaced nodes, not long bare gaps.
Shorter spacing usually means more energy and faster rooting.
They then favor stems that show new leaves, since this hints at strong momentum.
Avoid very old, woody sections, since those can root slowly and respond poorly.
Take Clean Cuttings for Fast, Successful Rooting
Clean, careful cutting turns a good stem choice into a strong new plant, so this step deserves slow, steady attention. Here, sterile technique matters. Clean scissors or a sharp knife with alcohol, then let them dry. This simple act protects the prayer plant from rot and slow healing.
Timed pruning also helps. Many growers cut in the morning, at the time the plant is hydrated and less stressed. Each cut should sit just below a healthy node, at a slight angle, in one smooth motion. No crushing, no sawing.
| Step | Why It Matters |
|---|---|
| Disinfect tools | Lowers infection risk |
| Use sharp blades | Makes clean wounds |
| Cut below node | Encourages quick roots |
| Remove extra leaves | Saves plant energy |
| Label cuttings | Tracks timed pruning results |
Root Your Prayer Plant Cuttings in Water
Now that the cuttings are prepared, the next step is to choose the healthiest stems and place them in the right kind of water container so roots can grow strong and safely.
In this part, the reader sees how clear jars, glasses, or small vases help them watch the roots form while also keeping the cuttings stable and supported.
After that, the focus gently shifts to how and at what point to move those water-rooted cuttings into soil so they adjust well and keep growing.
Choosing Healthy Cuttings
Choosing the right cutting for water rooting begins with really looking at how the plant is doing, not just grabbing the initial stem within reach. A grower initially pauses and studies leaf variegation, overall color, and posture. Healthy leaves signal strong internal energy that can support new roots, while faded or torn foliage often leads to weak cuttings.
Careful pest inspection also matters, because even tiny insects can drain strength from a new start.
To choose high quality prayer plant cuttings, a thoughtful grower looks for:
- At least one clear node with a small joint or bump
- Firm, unscarred stems that do not feel mushy
- Leaves with even variegation and no crisp brown edges
- No webbing, spots, or sticky residue from pests
Best Water Containers
On the kitchen counter or a sunny windowsill, the container that holds a prayer plant cutting quietly shapes how well new roots will grow. The right choice keeps the stem stable, the nodes covered, and the water fresh.
A clear vase gives you instant feedback. You can see roots forming, notice cloudiness in the water, and spot initial rot. This helps you act promptly, not after damage spreads.
A wide mouth is just as crucial. It allows air to move across the water surface, which keeps oxygen levels higher and roots healthier. It also prevents leaves from being cramped or bruised. Glass jars, short drinking glasses, and small storage containers often work best once they are stable, easy to clean, and not too deep.
Transitioning to Soil
Healthy roots in a clear jar are only the initial step; the real test comes once those tender roots meet soil for the inaugural time. At this moment, the cutting leaves its safe water world and starts soil acclimation, and that shift can feel scary for any plant lover.
To ease this change, the grower can focus on gentle care and gradual watering, instead of flooding new roots.
- Use a small pot with light, airy mix so roots can breathe and anchor.
- Firm soil gently around roots so the cutting stands stable but not squeezed.
- Keep soil evenly moist with gradual watering, never soggy, to prevent shock.
- Raise humidity with a loose cover, then vent slowly as roots strengthen.
Root Your Prayer Plant Cuttings Directly in Soil
Gently pressing a fresh cutting into soil can feel a bit scary at initially, but this simple method helps a prayer plant grow strong roots right where it will live. Here, direct-to-soil rooting gives the plant a stable home from day one. The grower prepares a loose mix, then blends in soil inoculants rich in mycorrhizal fungi, so microscopic partners surround each new node.
The cutting goes into a small, clean pot, buried deep enough to hold steady. Fingers firm the soil gently, never crushing the stem. Light watering settles pockets of air, and a clear cover or humidity dome keeps the cutting from drying. With warm temperatures, steady moisture, and patience, tiny feeder roots begin forming beneath the surface.
Pot Up Rooted Cuttings and Set Up Ideal Growing Conditions
Now that the cuttings have strong roots, it is time to move them into their own pots and give them a space where they can really grow.
In this part, the focus shifts to picking the right container, using soil that drains well, and managing light, humidity, and temperature so the young plants feel safe and stable.
Through setting up these conditions with care, a person helps each new prayer plant settle in smoothly and start producing healthy, lively leaves.
Choosing the Right Pot
With little rooted prayer plant cuttings ready to grow, the next step is choosing a pot that helps them feel safe and stable.
At this stage, container size matters a lot. A pot just 1 to 2 inches wider than the root ball keeps moisture balanced and helps roots fill the space with confidence instead of getting lost in extra soil.
When someone selects a pot, it helps to slow down and check a few details:
- Adequate drainage holes so water never sits around the roots
- A sturdy, tip resistant base that keeps tender cuttings from wobbling
- Light colored materials that keep roots cooler under bright light
- Smooth, clean interiors that reduce stress and allow roots to spread easily
Ideal Soil and Drainage
In the quiet moment after choosing the pot, soil becomes the soft blanket that helps a rooted prayer plant cutting feel secure. At this stage, the grower shifts from rescue to support, guiding new roots into a fast draining home that still holds gentle moisture. Many prefer peat free mixes, then refine gritty amendment ratios with perlite, pumice, or bark so water never lingers around tender roots.
| Focus | What It Really Means |
|---|---|
| Drainage initially | Water exits quickly, roots keep breathing |
| Air pockets | Gritty bits stop soil from packing tightly |
| Moisture balance | Mix stays damp, not soggy or bone dry |
| Root confidence | Stable soil helps cuttings settle and push growth |
Light, Humidity, and Temperature
From the moment a rooted prayer plant cutting is tucked into its new pot, light, humidity, and temperature quietly decide whether it will settle in or struggle.
It needs steady care, not perfection. Bright, indirect sunlight keeps new foliage compact and colorful, while harsh rays scorch tender leaves. Alongside this, high humidity and gentle, ambient warmth help roots keep drawing in moisture.
To dial in these conditions, someone can:
- Place the pot near a bright window with sheer curtains for filtered light
- Keep temperatures around 65 to 80°F, away from drafts or heaters
- enhance humidity with a pebble tray, room humidifier, or grouped plants
- Mist lightly in dry seasons, watching leaves for curling or crispy edges
Maintain Young Plants and Troubleshoot Common Propagation Issues
Caring for young prayer plant cuttings often feels a bit like checking on a sleeping child, because every small change can make a person worry.
So initially, the grower watches water and roots closely. Soil stays lightly moist, never soaked, so new roots can breathe. Once roots fill the starter pot, the cutting moves into a slightly larger container.
After two to three weeks of steady growth, a gentle fertilizer schedule begins, using a half strength balanced formula once a month.
This supports new leaves without burning tender roots. At the same time, careful pest management protects soft foliage. The grower checks leaf undersides for webbing, sticky spots, or tiny insects, then responds promptly with neem, insecticidal soap, or isolation.