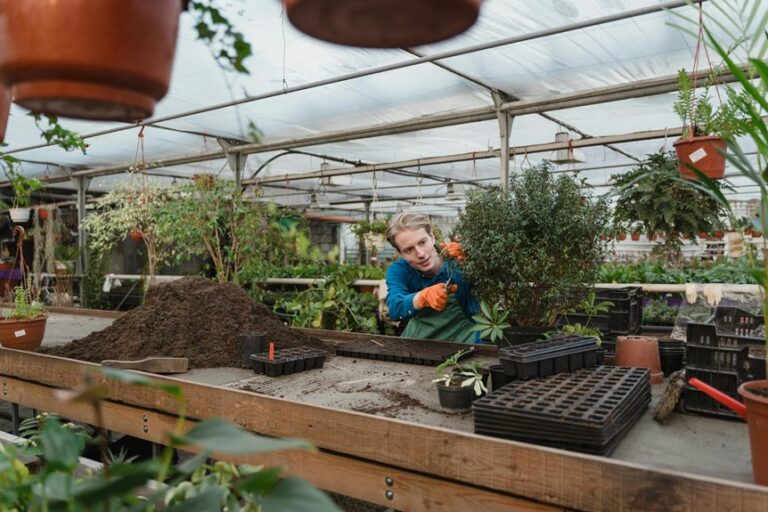
Early spring gardening sets the stage for a thriving growing season. However, many gardeners make mistakes that can impact their success. For instance, clearing debris from your garden keeps pests away, and adding organic matter boosts soil health. Awareness and preparation are key to avoiding pitfalls and ensuring your plants flourish.
Key Takeaways
Know your area’s last frost date to avoid planting too early. This helps protect young plants from frost damage.
Water your plants correctly by checking soil moisture. Overwatering and underwatering can harm plant health.
Test your soil regularly to understand its quality. This ensures your plants receive the right nutrients for optimal growth.
Early Planting
Understanding Frost Dates
When you start your early spring gardening, one of the biggest risks you face is frost damage. Young plants are particularly vulnerable to frost, which can occur even in late spring. Here are some key points to consider:
Young plants are more susceptible to frost damage than established ones.
Wild temperature swings can trick plants into growing too early, making them prone to late frosts.
Frost can form when temperatures dip into the mid to upper 30s, especially on calm nights.
To avoid frost damage, you need to know your area’s last frost date. This date varies by region and is crucial for timing your planting. For example, here’s a quick look at average last frost dates in different regions:
Region | Average Last Frost Date |
|---|---|
Zone 1 | April 15 |
Zone 2 | April 30 |
Zone 3 | May 15 |
You can find your specific last frost date by checking local gardening resources or using online tools. Websites like the Frost Date Chart or the Almanac provide valuable information tailored to your zip code.
Choosing the Right Time
Once you know your last frost date, you can plan your planting. Timing is everything in early spring gardening. Here are some tips to help you choose the right time:
Understand hardiness zones to identify which plants thrive in your area.
Consult local agricultural extension offices for insights into regional climate patterns.
Utilize microclimates in your garden to extend your growing season.
By planting at the right time, you can ensure your young plants have the best chance to thrive. Remember, planting too early can lead to critical damage to flowers or buds, ruining your harvest for the year. So, keep an eye on the weather and be patient!
Overwatering and Underwatering
Watering your plants correctly is crucial for their health. Both overwatering and underwatering can lead to serious problems. Let’s dive into how to spot the signs of overwatering and how to water your plants effectively.
Signs of Overwatering
You might notice several signs if you’re giving your plants too much water. Here are some common indicators:
Yellowing Leaves: If the leaves start turning yellow, especially the younger ones, it’s a sign of excess water.
Wilting: Overwatered plants may wilt but feel soft and mushy due to root rot.
Edema: This occurs when leaf cells burst from too much water pressure, leading to blisters.
Mold and Algae: Excess moisture can promote mold growth on the soil surface.
Root Rot: If you smell something foul or see black, mushy roots, your plant is in trouble.
Proper Watering Techniques
To keep your plants happy, you need to master proper watering techniques. Here are some tips to help you maintain the right moisture levels:
Assess Landscape Needs: Different plants have unique watering requirements. Know what your plants need.
Check Soil Characteristics: Understand your soil type to adjust your watering schedule. For instance, sandy soil drains quickly, while clay holds moisture.
Use Mulching: Applying mulch helps retain moisture and reduces the need for frequent watering.
Timing Matters: Water early in the morning or late in the evening to minimize evaporation.
Soil Assessment: Dig down a few inches to check the soil moisture. If it feels crumbly, it’s time to water.
By following these tips, you can avoid the pitfalls of overwatering and underwatering in your early spring gardening efforts.
Ignoring Soil Testing

Soil quality plays a vital role in your garden’s success. Healthy soil provides essential nutrients and supports plant growth. If you skip soil testing, you might miss out on important information that can help your plants thrive.
Testing Soil Quality
Testing your soil is simple and can make a big difference. Here’s how you can do it:
Collect soil samples from several spots in your garden, digging 4 to 6 inches deep.
Mix the samples together to get an average representation of your garden soil.
Follow the test kit instructions to analyze pH and nutrient levels.
Soil pH is crucial because it affects nutrient availability. If the pH is too high or too low for your plants, their growth can suffer. For example, blueberries prefer acidic soils with a pH between 4.5 and 5.5.
Remember, a soil test gives you a starting point for what nutrients your soil might need. This helps you avoid over-fertilization or nutrient deficiencies.
Amending Soil Correctly
Once you have your soil test results, you can amend your soil effectively. Here are some common amendments and their benefits:
Amendment | Benefits |
|---|---|
Vermiculite | Improves water drainage and retention |
Coco Coir | Enhances structure and water retention |
Sand | Improves drainage and aeration |
By adding the right amendments, you can create a healthy environment for your plants. Regular soil testing, ideally every three to five years, ensures your garden remains productive.
With proper soil testing and amendments, you set the stage for a successful early spring gardening season!
Plant Crowding
Effects of Crowding
When you crowd your plants, you might think they’ll thrive, but that’s often not the case. Crowding can lead to several issues that hinder growth. For instance, plants like tomatoes may become spindly as they stretch for light. Increased density also raises the risk of leaf diseases, which can spread quickly in tight spaces. To keep your plants healthy, aim for proper spacing.
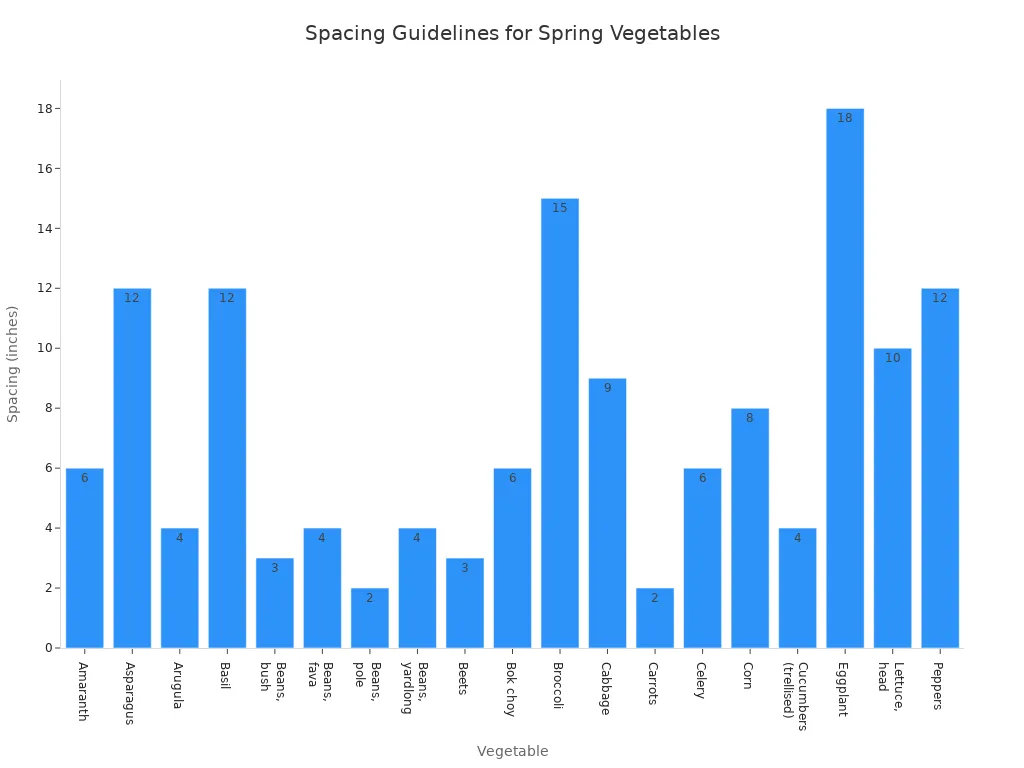
Recommended Spacing
Spacing your plants correctly is crucial for their success. Here’s a handy table with recommended spacing for some common spring vegetables:
Vegetable | Spacing (Inches) | Spacing (Centimeters) |
|---|---|---|
Amaranth | 6 in | 15 cm |
Asparagus | 12 in | 30 cm |
Broccoli | 15-18 in | 38-46 cm |
Carrots | 2-3 in | 5-8 cm |
Tomatoes | 24-36 in | 61-91 cm |
By following these guidelines, you’ll give your plants the room they need to develop strong root systems and healthy foliage. Remember, well-spaced plants can access nutrients and water more effectively. This leads to better growth and reduces competition for resources. So, take a moment to plan your garden layout before planting. Your plants will thank you!
Neglecting Pest Control
Early Signs of Pests
As you dive into early spring gardening, keep an eye out for signs of pests. Catching them early can save your plants from serious damage. Here are some common indicators that pests might be invading your garden:
Ants: Look for trails leading to food sources, small piles of sawdust, and visible nests.
Flies: Increased activity, presence of maggots, and frequent landings on surfaces indicate infestations.
Termites: Signs include discarded wings, mud tubes, and hollow-sounding wood.
Rodents: Droppings, chewed items, and nesting materials are key indicators.
Bees and Wasps: Visible nests and increased insect activity around your property signal nesting.
If you notice any of these signs, act quickly to protect your plants!
Preventative Measures
Preventing pests is easier than dealing with an infestation. Here are some effective measures you can take:
Seal Entry Points: Inspect and seal cracks around your home to prevent pests from entering.
Remove Standing Water: Eliminate sources of standing water to deter mosquitoes and other pests.
Relocate Firewood Piles: Move firewood away from your home to prevent pests like termites from nesting.
Use Natural Repellents: Plant herbs such as basil and lavender or use neem oil to repel pests.
Install Physical Barriers: Use row covers and fine mesh to protect plants from pests.
Add Pest-repelling Plants: Incorporate plants like marigolds and rosemary that naturally deter pests.
By staying vigilant and taking these preventative steps, you can enjoy a thriving garden this season without the worry of pests ruining your hard work.
Skipping Mulching
Mulching is one of those gardening practices that can make a world of difference in your early spring gardening efforts. You might wonder why it’s so important. Well, let’s break down the benefits!
Benefits of Mulching
Mulch acts like a superhero for your garden. Here’s how:
Moisture Retention: Mulch can reduce water evaporation from your garden soil by up to 33%. This means less frequent watering for you!
Weed Suppression: It creates a barrier that prevents sunlight from reaching weed seeds. This inhibits their growth and keeps your garden tidy.
Soil Temperature Regulation: Mulch helps maintain a consistent soil temperature, protecting your plants from extreme heat or cold.
Nutrient Enrichment: Organic mulches break down over time, adding nutrients back into the soil.
Check out this table showing how different types of mulch affect moisture retention:
Type of Mulch | Moisture Retention (%) |
|---|---|
Hemp Bedding | 80 |
Grass Clippings | 73 |
Bark Mulch | 16 |
Bare Soil | 0 |
How to Apply Mulch
Now that you know the benefits, let’s talk about how to apply mulch effectively:
Timing Your Mulch Application: Apply mulch in early to mid-spring when the soil has warmed to at least 50°F.
Preparing Soil with Mulch for Growth: Remove old mulch and debris, loosen compacted soil, add compost, and water the soil before applying mulch.
Choosing the Right Mulch for Your Garden: Use organic mulch like shredded bark or compost for the best results.
Applying Mulch the Right Way: Spread a 2-3 inch layer of mulch, keeping it away from plant stems to prevent rot.
By following these steps, you’ll maximize the benefits of mulching and set your garden up for success this season!

Ignoring Sunlight Needs
Sunlight is crucial for your plants’ health. Without enough light, they struggle to grow and produce. Insufficient sunlight can lead to slower growth rates, weak stems, and pale foliage. You might even notice your plants stretching toward the light, becoming leggy and spindly. To avoid these issues, you need to assess sunlight exposure in your garden.
Assessing Sunlight Exposure
To accurately gauge how much sunlight your garden gets, follow these steps:
Choose Your Spot: Pick a sunny day and select an area in your garden to observe.
Time Your Photos: Start early in the morning and take pictures every 2-3 hours. Make sure your camera’s time stamp is on.
Review the Photos: Look for changes in sunlight intensity and shadows throughout the day.
Analyze Sunlight Exposure: Categorize the sunlight exposure into full sun, partial sun, or shade based on the total hours of sunlight received.
Different areas in your garden receive varying amounts of sunlight. For example:
South-facing gardens get the most sun, perfect for sun-loving plants.
North-facing gardens receive the least sun, suitable for shade-tolerant plants.
East-facing gardens enjoy morning light but avoid harsh afternoon sun.
West-facing gardens get bright afternoon sun, ideal for certain vegetables.
Plant Placement Strategies
Once you know your garden’s sunlight patterns, you can place your plants wisely. Here are some effective strategies:
Plant taller plants on the north side and shorter ones on the south side to prevent shading.
Use trellises for climbing plants to maximize sun exposure and shade the soil.
Incorporate reflective surfaces like mirrors or aluminum foil to direct additional sunlight into your garden.
By paying attention to sunlight needs, you can help your plants thrive in your early spring gardening efforts!
In early spring gardening, avoiding common mistakes can significantly boost your garden’s success. Remember to check soil moisture levels, space your plants properly, and wait for the right time to plant. By applying these tips, you can enhance your gardening experience and enjoy a bountiful harvest. Happy gardening! 🌱
FAQ
What should I do if I miss the last frost date?
If you miss the last frost date, wait a week or two before planting. This gives the soil time to warm up and reduces frost risk.
How often should I water my plants in early spring?
Water your plants when the top inch of soil feels dry. Generally, this means watering every few days, depending on rainfall and temperature.
Can I use any type of mulch in my garden?
Not all mulch is suitable. Use organic mulches like straw or wood chips for best results. They enrich the soil as they decompose. 🌱